
Sea of Stars Guide – Maelstrom Point
Mission List (Tap to jump down the page!) |
||
South-West Island |
||
North Island |
||
South-East Island |
||
Maelstrom Point / Stormcaller |
We’re now back with a slightly longer chapter and a clear path ahead. With Hortence’s map acquired, there are three islands dotted around, with one rod on each. We need to destroy these and then head aboard Maelstrom Point and confront the Stormcaller. We can now control The Vespertine too, which is a neat addition.
Given our starting position, it makes sense to tackle the South-West Island first and then move around clockwise until we return to Maelstrom. Although in truth, all of these islands are quite close together so it doesn’t matter in which order you do this.
South-West Island
Use the campfire and save when you first arrive. There’s a strange wheel at the back of the main island, which holds the slot for 6 doubloons. We basically need to explore this area and collect all six to place in the machine.
Doubloon 1
Immediately to the right of the main island, we’ll have a little puzzle to complete. It’s fairly straightforward; knock Box A down then use Box B to circle around clockwise, hitting the tree and knocking the Doubloon out.

Doubloon 2
From this location, head as far north as possible, slightly to the east and you’ll come across a beach. Climb up the walls and hop over the platforms. Grab the Doubloon and destroy the enemies that show up.
Doubloon 3
Head south from this island and kill the three pirate enemies circling the Doubloon. We can then collect this and be on our way!
Doubloon 4
This one is located left of the save point. Destroy the three pirate enemies, climb the steps and it’ll be right there waiting for us.

Doubloon 5
Jump into the water from the Doubloon 4 location and immediately swim north. It’s on a little island by itself.
Doubloon 6
Just left of the Doubloon machine on the central island, head north west and platform over the obstacle course. You’ll find it at the end of this route.
With all the doubloons gathered, head back to the machine and place all 6 inside. It’ll raise two platforms on either side that we can use to smash the crystals. In order to destroy them, we need to use our Graplou so go ahead and climb each platform and then point your Graplou at the crystal.
North Island
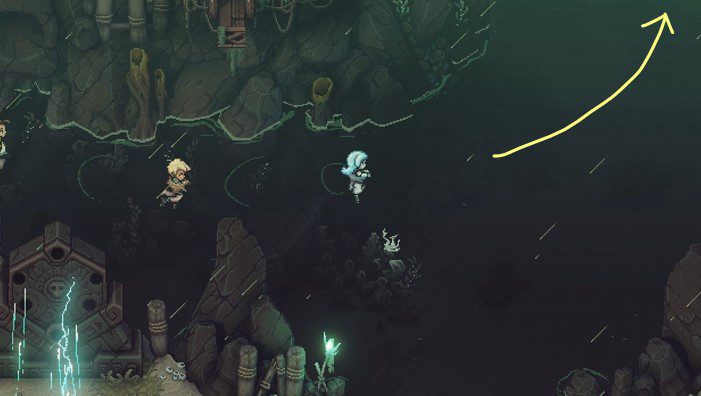
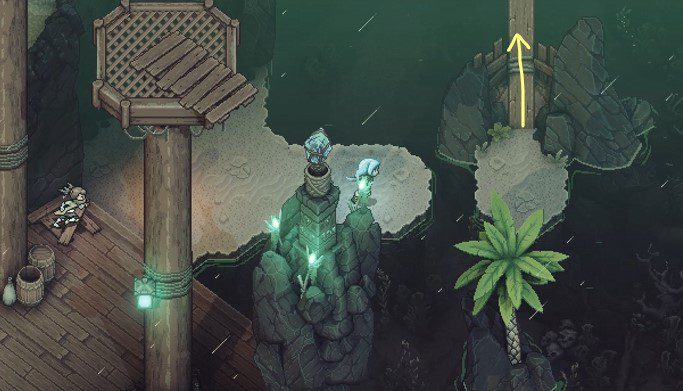
After landing, use the campfire and save. Keep moving north east and hop over to the sandy platform. The perspective in this area is a little skewed because in all honesty, the beam we need to cross looks like it’s sticking up in the air (the pitfalls of isometric views, eh?) Basically, we need to walk across this beam:

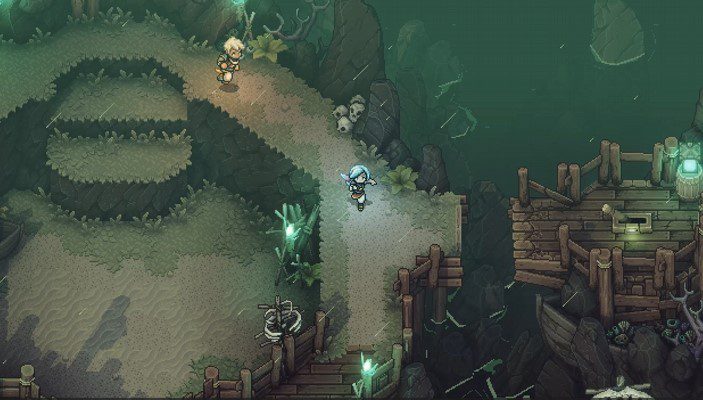
With that settled, climb over the beam and follow the linear pathway. You’ll be ambushed by pirates so be sure to defeat these enemies. Head left from here and follow the linear platforming section around.

Defeat the enemies at the top of this section and follow the path around, tightroping over the platform until you reach the main machine. Destroy the crystals that are here.

There’s one to the south west of this machine, and another to the south east. You’ll need to use your Graplou to reach the one to the south east though.

Follow the narrow path just north of the machine and climb up the net. The last two are next to one another here.
South-East Island
When you arrive, rest and use the save point. There are a few enemy groups dotted around in this area and it’s a good idea to defeat them all. Do note that you can rest up between fights if you want to replenish your HP, MP and your item stash!
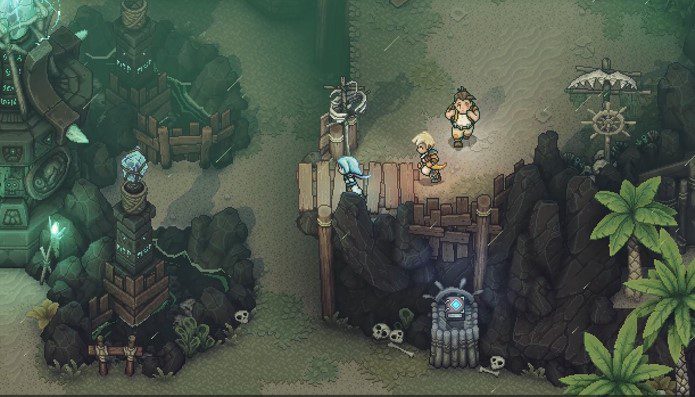
When you’re ready, head all the way to the back of the island, as far north as you can go. From here, circle around the arena and flip the switch to the right.
This will raise a platform just to the south of you. Just before you head down and jump over, be sure to use your Graplou to destroy one of the crystals. Head down and jump over, defeating the enemies along the way. At the bottom of this platform, just left of the ship wheel, is another wooden platform which leads to another crystal.
With these two destroyed, head back to our starting position and circle around to the left instead. There’s another switch here, so circle around to the far left to reveal a Graplou point.
Just as we did before, don’t jump over just yet. Destroy the crystal first. When you’re ready, grapple over and take out the pirate goons. Destroy the next crystal and take out the final barrier.
Maelstrom Point
We’ve done it! With the barrier gone, we can head onto Maelstrom Point and confront Stormcaller. Be prepared though, this is a tough boss and we’re going to need everything we have to take him out.
Before we do, climb up the linear platforming section, being sure to put into practice everything we’ve learned, including grappling, climbing, platforming and shimmying across walls.
At the end of this route is a save point and a campfire. Rest up and cook anything you need.
Boss Fight – Stormcaller |
||
|
Stormcaller is a tough foe and his charged attack can do some serious damage. There are a few tactics we can use to dispel this, which we’ll get to shortly. Before that though, Stormcaller uses a couple of other attacks, including Thunderslash, which sees him slash his sword at you and dealing a medium amount of damage. One of his charged attacks isn’t too bad, which is called Chain Lightning, dealing thunder damage to the whole party but for less damage than Thunderslash. The one we want to watch out for though is Ruler of Tides. This is a nasty attack that does huge damage to the whole party and basically plays out like a summon ability from the old JRPG days. He’ll fall back into the sea, and come back with a dragon which will then spit fire at you. There are a couple of tactics to dispel this and both require a good amount of MP. The first comes from using Valere’s Lunar Shield. You’ll know Ruler of Tides is coming because there will be significantly more locks to break – 8 in total. When Stormcaller only has 1 move left, switch to Valere and use Lunar Shield to mitigate the amount of damage deal. Another tactic is to use Serai’s Disorient. It’s an effective move that works a charm against enemies that wind-up big attacks. In using this, it delays an enemy 2 more moves before using their attack. This is especially useful if you only have a couple of locks to break. The chances are though, you’re going to be hit with Ruler of Tides at least once in this fight. Be sure to bring plenty of healing items with you, and save the Combos for Mending Light too. Mooncradle Fish Pies are a great option for this fight as they’ll replenish MP and HP at the same time. Be sure to heal often and use your offensive skills wisely. Moonerang is a great choice if Stormcaller has more than 3 moon symbols while prepping either of his charged attacks too. Alternatively, you can use Serai’s Disorient after Ruler of Tides as a way of giving yourself more time to heal and recover from the nasty move, following it up with Combo: Mending Light for good measure. Depending on your level at this point, this may be a rather long fight, but if you play it smart, you should come out on top without Stormcaller wiping out your entire party. Just keep dealing damage between healing and don’t let your health drop too low! |
||
| Rewards: | ||
| 2240 Experience Points | ||

With the Stormcaller defeated, we’ll immediately be back on The Vespertine. Watch the cutscenes and then set sail from Brisk. Although we can explore the surrounding area, we can’t actually disembark anywhere. Instead, just follow the map to the north east of the sea.

When you arrive, exit the boat and enter the new area called ‘???’. There are a number of cutscenes that ensue, before a villager approaches, pointing out some ruckus to the north. Let’s go exploring.
<< The Vespertine |
Mirth / Jungle Path >> |
You can check out our full walkthrough and game guide here! |
|
About the north’s island in that part of the game, I can’t find how to return to its entrance once I broke the 4 crystals. (Which is exactly WHY I came to this guide in the first place.)
Could you add some explanation of THAT please?