
Sea of Stars Guide – Derelict Factory
Mission List (Tap to jump down the page!) |
||
The Sea of Stars |
||
Derelict Factory |
||
Activating the Crane |
||
Left Room |
||
Right Room |
The Sea of Stars
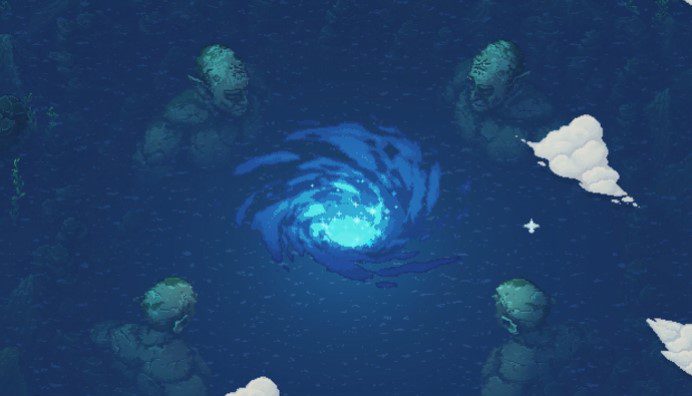
After the crazy events from before, we begin at Cloud Kingdom. Return to the council and with the mission complete, they will grant you access to the Sea of Stars. A new area will open up on the world map, typified by a whirlpool flanked by four stone heads.
Head out the council and use Puntie to take you to Khukharr. It’s the fastest way to immediately get back on the high seas again. Once you do, head for the marked area on your map. It’s right in the center, so head over there now and interact with it.
From this new location, move your ship to the far left and into an area called “Trek to the Center of the World”.
This is a simple enough place, and it’s a very linear path, punctuated by a number of glittery enemies along the way. These are slightly tougher versions of all the foes we’ve faced up until this point – and a good way of gaining extra experience points. The area itself will basically see you continuing to descend down different drops before moving all the way to the left, coming out at The Sea of Stars.

When you enter this beautifully surreal location, interact with the dock and board your pirate ship. As you progress out, you’ll notice glittery areas of the sea sparkling. What we need to do is head straight for this area and interact with the white orbs, which will whizz us forward at breakneck speed. Do this several times, and you’ll get a surreal sequence that sees the entire perspective change to 3D!
Head forwards, collecting up as many little stars as you like, and eventually we’ll reach another dock.

When you reach land again, interact with the strange cave on the left, marked ‘???’. Progress through the linear pathway and you’ll find a button on the north east area of this dark room. Press it, and the lights will switch on to reveal some sort of strange factory.
Unfortunately, turning on the lights has also awoken the Guardian, who reveals that the compound has been breached and you need to be destroyed.
Boss Fight – Guardian |
||
|
Guardian is a simple enough foe but he uses different abilities depending on which arm he chooses to use. With his left, he’ll use Taser Grip, which grabs the whole party and deals damage to everyone. There’s also a Sharpshooting gun shot, where Guardian will grab his arm, aim and hit one player for damage. If that wasn’t enough, he’ll also spawn a couple of minion enemies too. These annoying critters can summon a Hex Shield that basically works as extra protection against our attacks. For that reason, you want to take these little guys out as soon as they show up on the battlefield. There’s also another reason too. With these guys flying around, Guardian will use a charged attack called Power Shot, where he’ll use both minions as projectiles to enhance the damage done to a character. Thankfully they don’t have too much oomph behind the shot but if they do shield Guardian, use normal attacks or mana-boosted attacks to preserve your MP. You’ve also got new Ultimate moves to use should the fight go on for a while, although Combo attacks like X-Strike and Arcane Barrage work really well here. The shield HP can visually be seen by turning from blue, to yellow and then red as its HP decreases. Do not use any Ultimate Attacks when Hex Shield is active though, it won’t do any damage to the main boss, only the shield. When you’re nearly done, Guardian will begin smoking and have visible scars. This is your cue to hit it with everything you’ve got. |
||
| Rewards: | ||
| 7280 EXP | ||

After the boss, we’ll learn more about Serai, including how she’s able to manifest portals. It turns out she’s actually from this world! She’ll explain that her world has been destroyed by The Fleshmancer and the Dweller of Dread is here too, which doesn’t help matters. Our destination is going to be the Sky Base, but the way there is perilous and full of many dangers.
When you’re ready, head through the doors ahead and across the linear path, into our ship and, subsequently, the central Sea of Stars area. There’s another big world map to explore, although thankfully we’ll see most of this during the main campaign. To begin with, head north east from our location and dock.

Derelict Factory
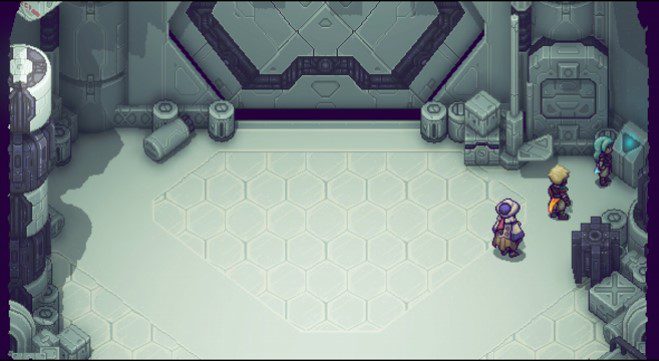
When you enter the grounds, there’s a campfire and a save point to the right. Use these and then progress left of the main entrance, which is currently locked.

Proceed all the way up this walkway and from the edge of the platform, jump down and smash the glass to enter the facility. Open the chest to the left to reveal Recipe: Sashimi.
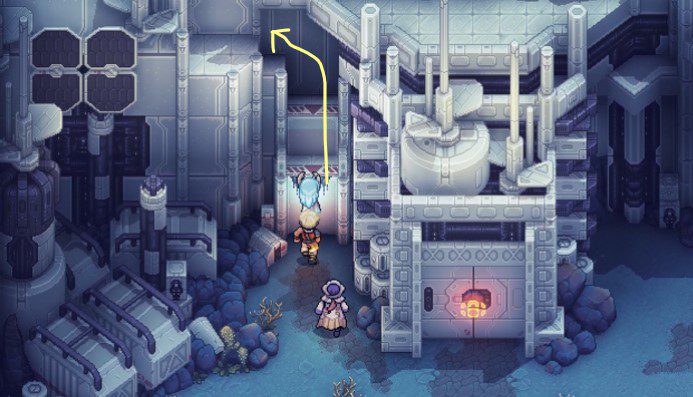
Follow the stairwell around to the left and push the orange button to open the way forward. Go and interact with the console that just blinked orange. This will open up the way back should we wish to head back outside. Otherwise, keep moving north.
In the next room, hit the console on the far right, hopping over a couple of platforms to reach that spot. This will activate a teleporter, so stand on the spot with blue glowing lines on the ground and hit the action button.
You’ll notice a whole bunch of red circular trackers trailing the ground, which is a mainstay in this factory. During certain periods of the factory (not this one though), you can actually avoid a few enemy encounters by timing your runs to avoid the hassle.
After defeating the enemies, hit the console on the left to move the teleporter back. Ignore the chest on the elevated platform to the right for now and climb back up the wall. We want to double back to our starting position here.

When you jump down, enter the teleporter again to be transported further back. Now we can proceed immediately to the right, following the pathway across and opening the chest, revealing 1x Wireplate Armor.
Activating the Crane
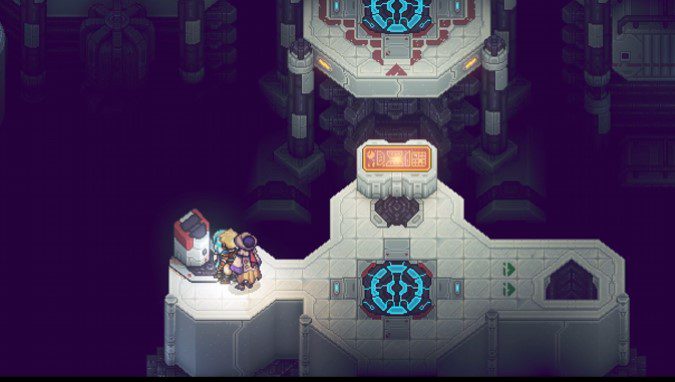
In the next room, you’ll notice several different elements here, including an elevator straight ahead in the middle of the room out of commission. There are different slots where items appear to go and, more importantly, a campfire and a save point to the right. After using both of these, head back into the central corridor and proceed all the way as far north as we can go.
The orange Crane terminal won’t be working for now, so instead activate the console on the left. This will turn on the teleporter to help us on our way.
Use the teleporter and in this new area, proceed into the doorways ahead. You’ll immediately notice a strange glass passage all the way along the ground, splitting over into two different locations. There are also more of these red sensors as well.
On the left, there will be two buttons on the wall. The one on the left will hold some meat, while the orange and yellow lightning symbol will activate one half of the way forward. Do the same on the right side.
This will activate a walkway, allowing us to progress further into the room. Ignore the console here for now and instead, open the wall cabinet to the left, which holds 1x Crane Operator ID Card inside.

Return back the way you came, hit the teleporter and now we can control the original console. In doing so, a laser crane will appear and allow us to start moving blocks around. First up, move the crane to the far right and you’ll notice a chest just sitting there. Once you’re hovered over, with the laser turning green, interact with it and move the block down to its slot just to the right of the console you activated.

Slot the chest in place, step away from the console and grab 1x Rainbow Conch. Now back to the console. Remember the teleporter that helped us get to the ID Card? We want to hover over that, pick it up and move that block to the left and right of our location, in the plus symbol slots.

Slot the teleporter into the left one first and step away from the console. Jump in our teleporter to be moved to the far left of the room.
Left Room
Head into the doorway and you’ll notice three doors ahead. Here’s what’s in each:
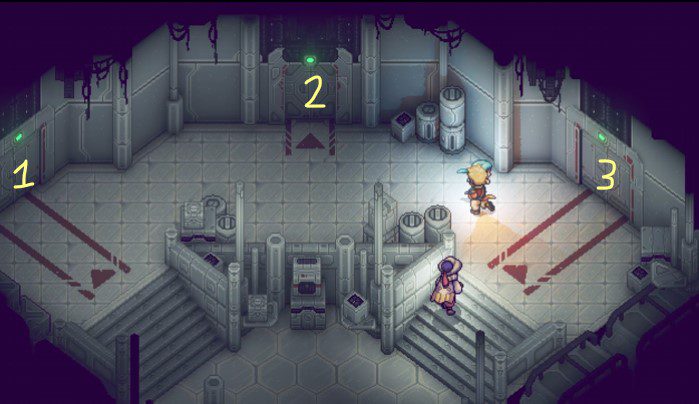
1) This room is full of sensors all over the floor. You need to make sure you’ve gone into room 2 first before tackling this! Defeat the enemies should you trigger them, or do your best to run around, and activate the console. In doing so, add 1x Wireplate Sheet from your inventory. Head into the door to your left and collect up the power unit.

2)There’s a small puzzle in here to solve in order to open up the three wall chests. You may need to head out and back in again twice to get everything! In the chest to the left is 1x Kybermesh Daggers, to the right is 1x Sapphire Ore. The middle chest holds 1x Wireplate Sheet. To get the middle chest you need to do the following:

- Push the left block up.
- Push the right block up.
- Push this block to the right in the slot where block 2 was originally placed to clear a path through.
- Push the left block (1) all the way to the left and out of sight.
- Push the right block (2) all the way to the right.
3) There are three sensor trackers on the ground and four different wall chests holding: x3 Gold, 1x Sashimi, 1x Blueprint Disc, 3x Dairy.
Right Room
In this room, climb up the ladder and activate the console. Jump over the Graplou point, activating that console before jumping back and interacting with the original console again. This will move the Graplou point across and allow us access to trhe next console. In doing so, this will blow a hole in the rock from the rocket down below. Follow this pathway along and collect up 1x Kyber Ore.
After this is done, return to the central console again and interact with the crane. Move the teleporter to the back of the room and spring over. Immediately head to the back of the room and interact with the console. Place the Power Unit, Blueprint Disc and Kyber Ore inside and return back to the previous room with the crane console.

Hop on the crane again and this time, move to the north west, collecting up the Kyermesh Battery and place it in the open slot just to the left of the elevator.
With the lift now operational, hop in and let’s leave this factory once and for all.
<< Cloud Kingdom |
Repine / Cerulean Expanse >> |
You can check out our full walkthrough and game guide here! |
|