
This Bed We Made Guide: The Basement & Room 509
Area List (Tap to jump down the page!) |
||
The Basement |
||
Room 509 |
||
Bernard’s Office & Room 509 Again |
The Basement
When you gain control of Sophie, you’ll realize you’ve clumsily left your keys in the breakroom, so it’s time to head back down again to get them back. Walk all the way down the hallway and interact with the lift. Go down and in the basement and when you emerge from the lift, be sure to check out all the leaflets and notes up on the wall.
There are a whole bunch of lockers too just to the left of this, so be sure to open them up and take a look.
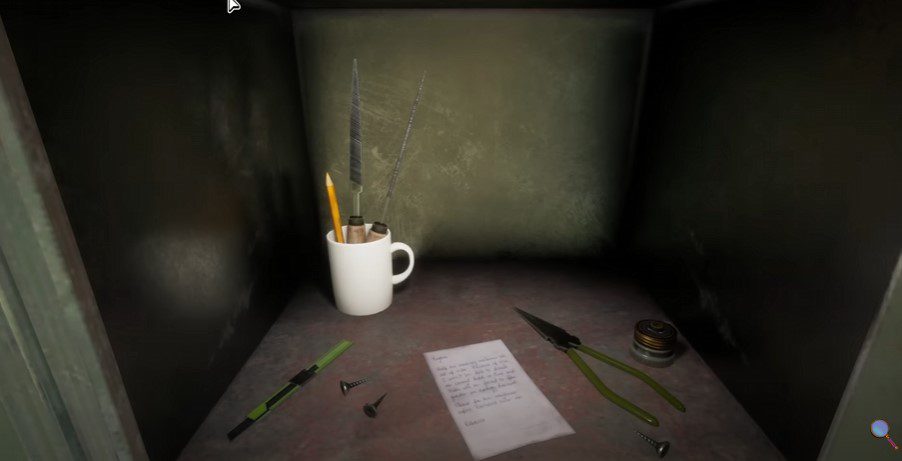
Open the locker with pliers and a cup of tools (pictured above) and interact with the note. Be sure to hover over the words “apology discount” while examining further to gain an extra bit of dialogue involving Beth.
When you’re done snooping about, shut the locker and enter the room to the right of the clocking in machine (just to the right of the laundry room).
Before taking the key though, a cutscene will trigger. Someone has left a rather unsavory note up on the wall. Examine the note just above and it’ll be addressed to Linda. Apparently it’s about someone called “B”, which is obviously Bernard.
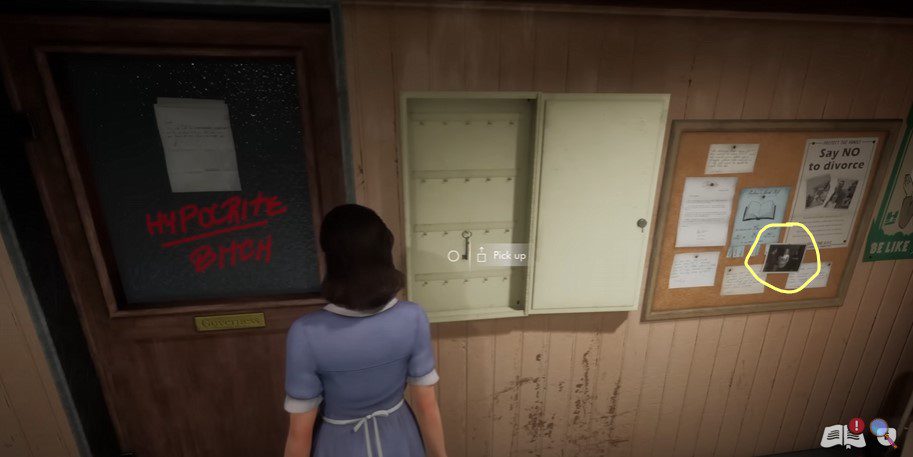
Pick up the key from the cabinet, but you also want to check out the notes on the noticeboard just to the right of this, especialy the black and white photograph.
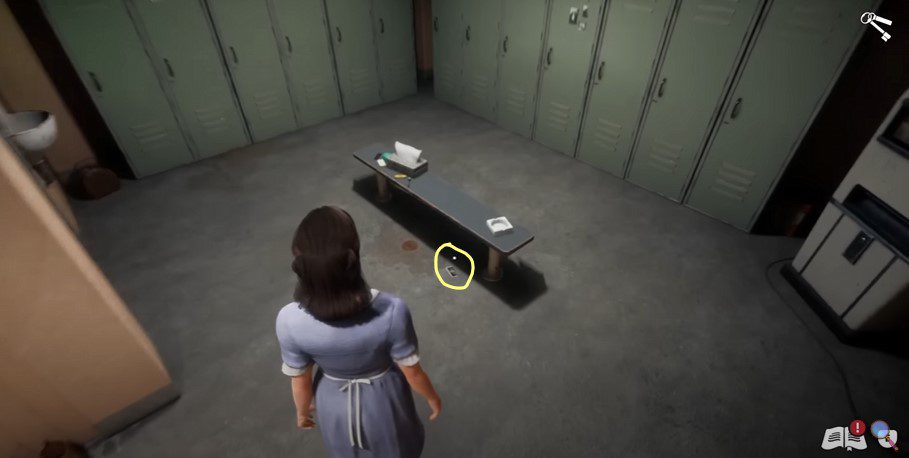
Be sure to open the note, examine the different parts, and also the back of the photo too. Once you’re done reading through all the individual notes, turn around and interact with the torn picture on the ground by the bench (pictured below).
Next, open the door and follow the crying to where Wendy is sobbing. After gathering all the evidence you can, reassure Wendy by selecting “I overheard you and Jacques earlier”.
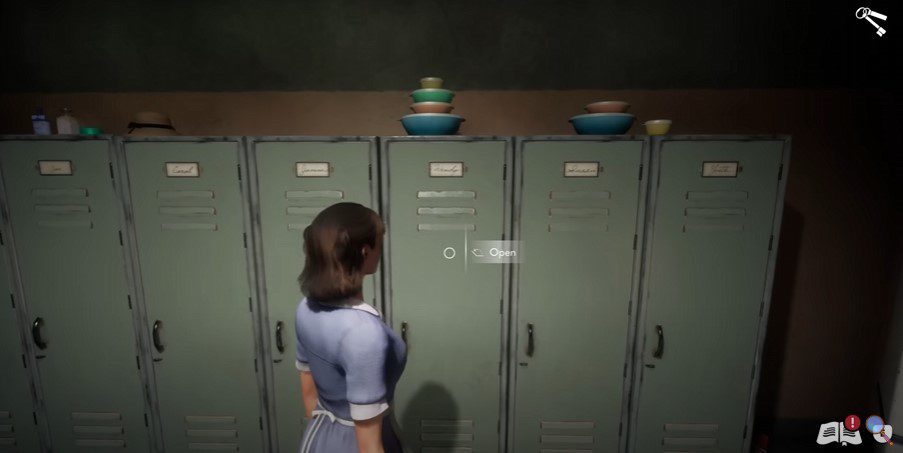
After, open the various lockers in this area and be sure to interact with everything. When you do, remember to close the lockers once you’re done. The most important locker to open though is the one with all the stacked dishes on top (pictured below).
Inside, you’ll find the lipstick (which you can interact with further to find the similar shade of red) and also a letter with handwriting on too. Be sure to Throw Away the lipstick afterwards. The next locker to the right is Susan’s, so open it up and check out the note in there too. Next, open the final locker on the right and you’ll find the other half of Jacques’ photo.
With all of this done, return to the elevator again. With Linda’s key in your possession, when you arrive at the lift, be sure to update your chosen partner on the latest gossip. When you’re prompted, be sure to use the flirty dialogue options.
After, interact with the elevator and return to the fifth floor lobby.
Room 506 Detour
On the way over to 509, be sure to go in Room 506 on the way. The place is a complete mess, so be sure to clean up all the mess over the floor, including turning off the TV, replacing the pillows on the bed and taking down all the valentine’s gear. Be wary of the balloon that’s hanging on the ceiling too!
Empty the bin, clean the bathroom and the lipstick message on the wall and also clean the bath. It’s not too far out of our way, but it will definitely help toward our achievements at the end of the game!
Room 509
Now were officially in Room 509, let’s get cracking. To the left of the door, inspect the note before opening the bathroom. Clean everything, including the dirty towels and the bath. When you clean the bin, you’ll notice 1x Torn shreds of paper at the bottom, so be sure to pick these up before continuing.
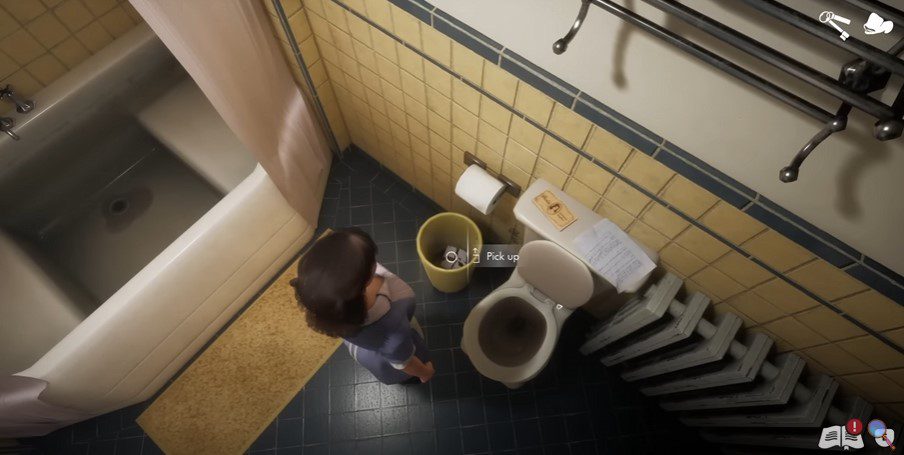
Next, inspect the notes on the back of the toilet before replacing the towels in the bathroom, being sure to detour back to your trolley on the way. With all of this done, close the bathroom door and let’s inspect the rest of the room.
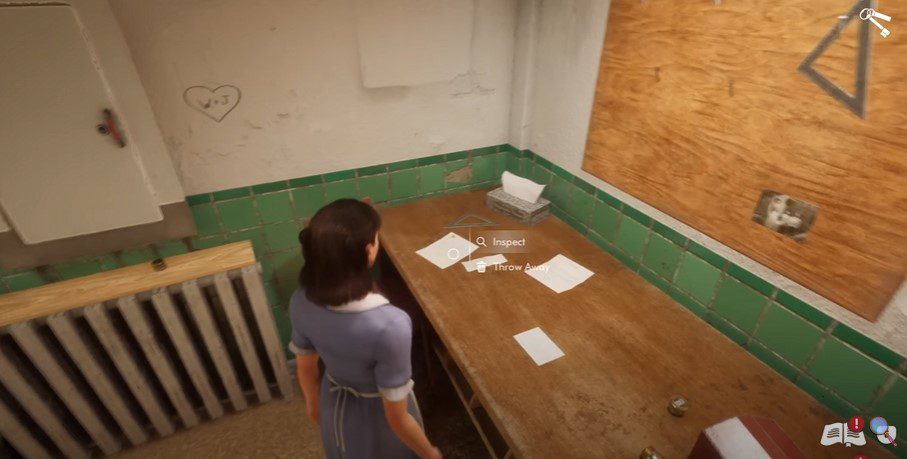
By the table, you’ll find an apology note to inspect, business cards next to the fireplace and a suitcase tucked under the sofa. Now, the second torn shreds can be found in the bin to the right of the sofa. Clean the trash inside and pick up 1x Torn shreds of paper.
Answer the phone when it rings and a stranger will answer, breathing heavily down the line. After asking your Apprentice about the call, exhaust the dialogue. This includes the dialogue about Mrs Cruz rushing out the hotel at 10.01am.
When you get back to inspecting the room, check the papers over on the beige chair, and open the little suitcase too, paying attention to the diary and the dates therein. On the desk to the left there’s a bunch of other papers but, more importantly, another suitcase in the bedroom adjacent to this room.
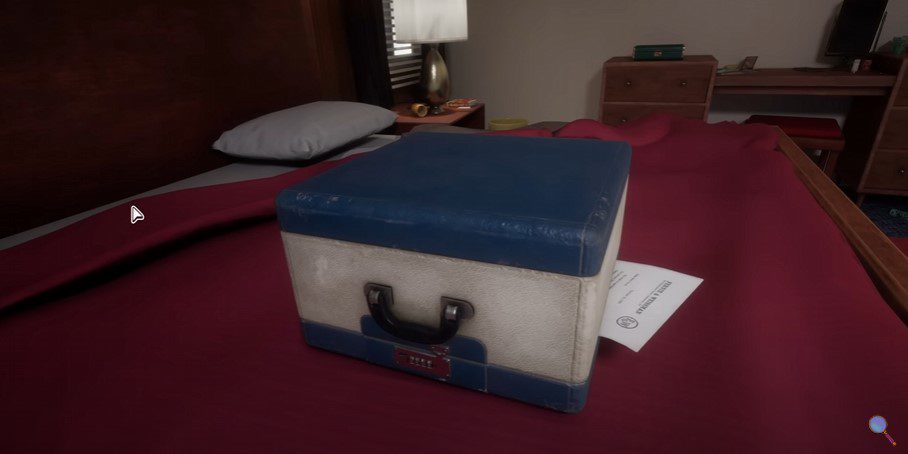
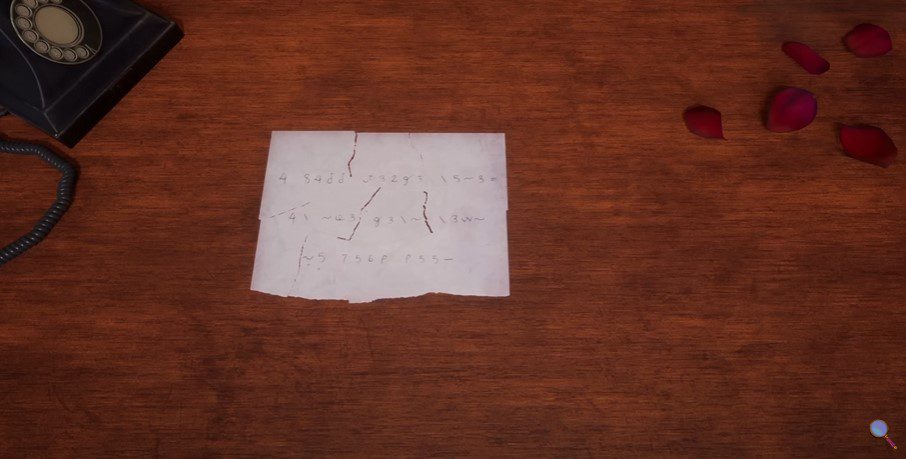
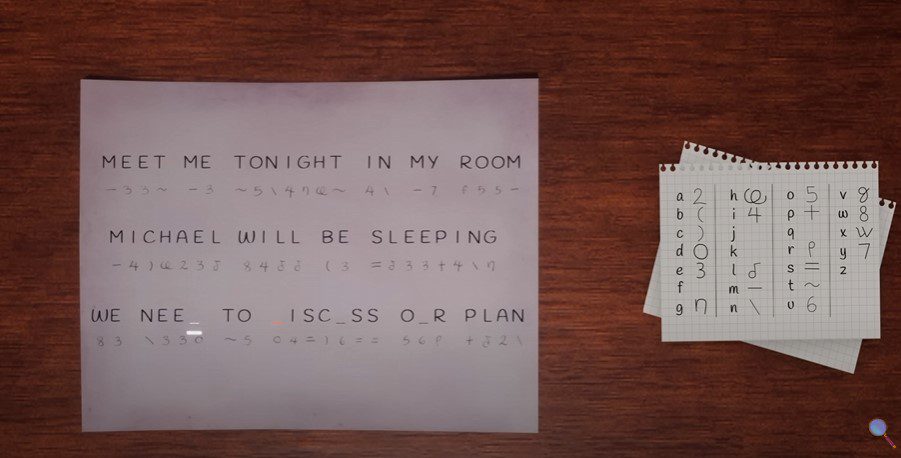
Interact with the paper sticking out the suitcase and make note of the F&W logo. After putting it down, clean up the room, including making the bed and cleaning the bin in the corner. There, you’ll find the third and final Torn shreds of paper. With this together, we’ll have a simple puzzle to solve.
The idea here is to align all the shreds of paper to spell out the code. Align the straight edges at the top first, with the largest piece slotting in the top left. From here, it’s relatively simple just to rotate each of the pieces until it spells out the clue (pictured below).
With this done, return to the bedroom and examine the same note again, the one next to the briefcase. After, examine the desk in the corner and check the diary. Make note of the numbers in the bottom right hand side.
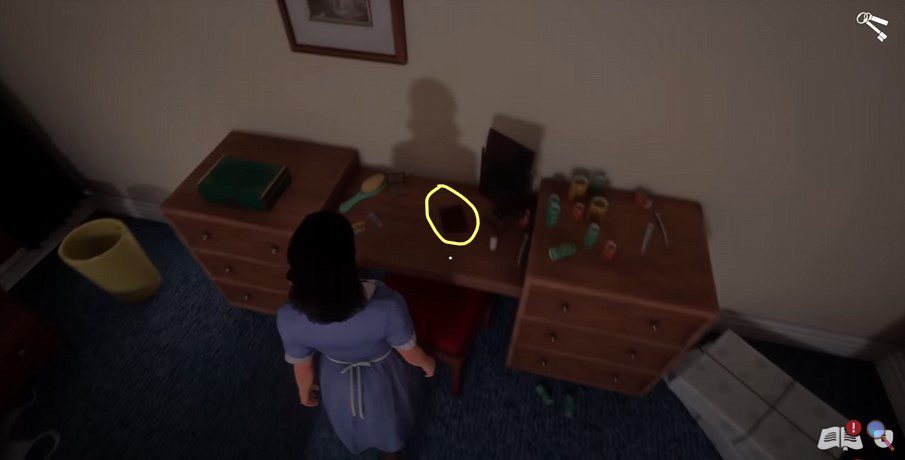
Next, examine the papers just to the left of this, and highlight over where it says Texas Trust Bank. Finally, there’s a snippet of paper just on the bedside table (next to the bin). Examine all of this thoroughly before leaving the room.
Now, return to Room 505 and up on Mr Spade’s wall, examine the Beaver Lake Skate Rental note (the one on the top right of the map) and also Harry’s Diner receipt (on the bottom right) to find more symbols.
With all of this gathered, return to the note and you’ll be able to decipher the hidden message.

The note cracked, phone through to your partner and unveil all the clues so far. It would seem that there could be an affair on the cards here, not to mention the emptied account by Mrs Cruz. It’s all very mysterious!
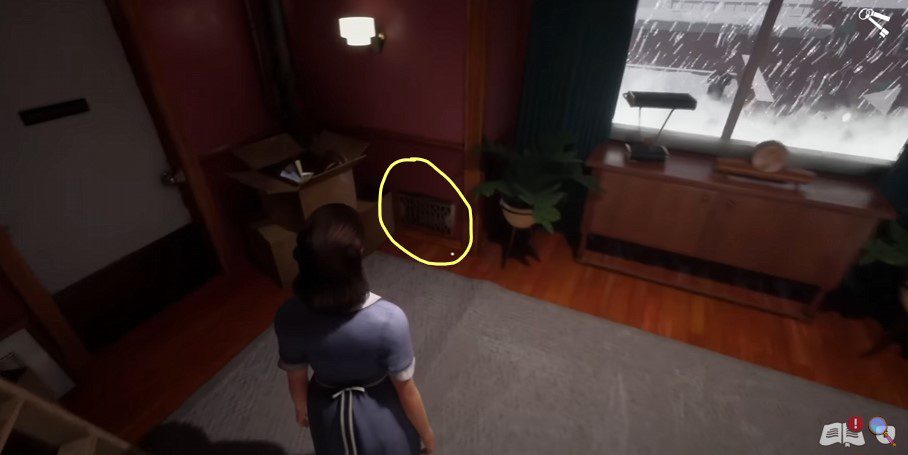
Leave the room and head to the left, down the hallway until you reach the vent. Interact with it and you’ll find the note inside. However, you need a screwdriver to open it.
Head into the maintenance room just to the left of this and turn the note here in another puzzle to find a secret note. With this gathered, interact with all the different notes and letters in here. Be sure to also interact with the kissing spot sign up on the wall too for part 2 of the earlier achievement.
Leave the room and head all the way back to the elevator. Bernard will show up and follow you down. At this point you have another branching narrative choice. Both will lead to a different achievement.
Bernard’s Office
At the start of this next area, you’ll find a water all over the floor by the window. Mop up the water and pick up the screwdriver. Check the letter next to it and then throw it away. Close the window and inspect the letter in the typewriter. You’ll learn more about the issues between Bernard and his brother.
Open up the desk and inspect the drawers too. You’ll find there’s a bra in one of them, which clearly belongs to Linda. Next, open the filing cabinet in the corner, and be sure to select “Throw Away” on the documents in there. There are two framed photos up on the wall too so inspect those also.
Leave the room and you’ll find Bernard in the hallway. Lie again and claim that someone left the door wide open to his office.
When Bernard heads into his office, be sure to eavesdrop on what’s going on inside.
Back To Room 509
Now, head back upstairs again. With the screwdriver in hand, return to the vent. On the way, Room 508 will be open so be sure to clean the place up. There are also a few notes on the table but nothing that’s that important to note.
Use the screwdriver on the vent, open it up and you’ll find another cryptic note. Solve this (pictured below) and phone your partner again.
They will encourage you to go and check out Room 507, so now it’s time to move onto our next port of call. Before you leave the room, make sure you throw the notes away on the table. There’s also a Safe in here too but you won’t be able to open that just yet. We’ll circle back to that later in the guide.
<< Room 505 |
Room 507 >> |
You can check out our full walkthrough and game guide here! |
|