
Lies of P Guide – Collapsing Krat
Krat Central Station Platform
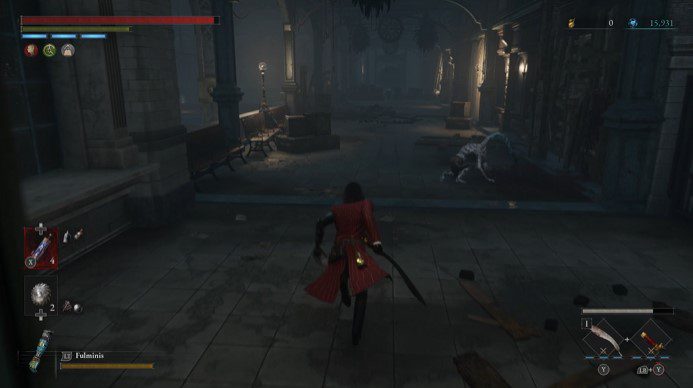
We’re back at Krat Central Station but things have certainly changed since the last time we were here. From your starting position, head up the platform and take out the infected. Head all the way to the end of this section and grab 1x Bloody Letter.
Head into the open carriage door on the right and through to the other side. Kill the infected and grab 1x Attribute Resistance Ampoule from behind it.
Next, head into the open doorway and up the stairs. Repair the Stargazer and proceed on to the next area.
You’ll see a long passageway here and a locked door to the right. Continue down the path and turn left when you reach a wooden ramp. You can continue forward and drop down, or balance across the beam, but all of this connects up to later parts of the level so don’t worry too much about missing anything.
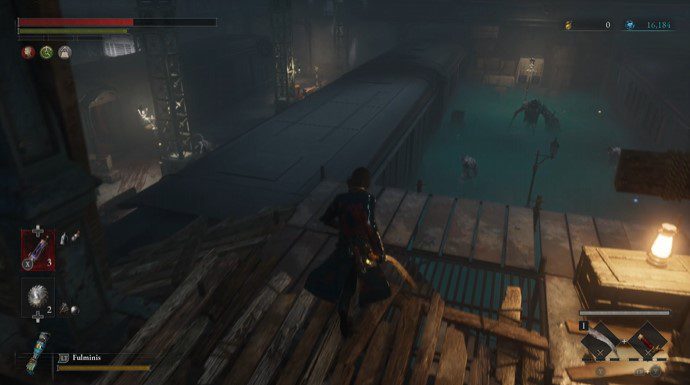
Pass along the wooden ramp and cross the train to the left. Drop down and open the chest, being sure to take out the infected down here when you do, to grab 1x Quartz. There’s also 1x Fire Canister and 1x Resplendent Ergo Fragment.
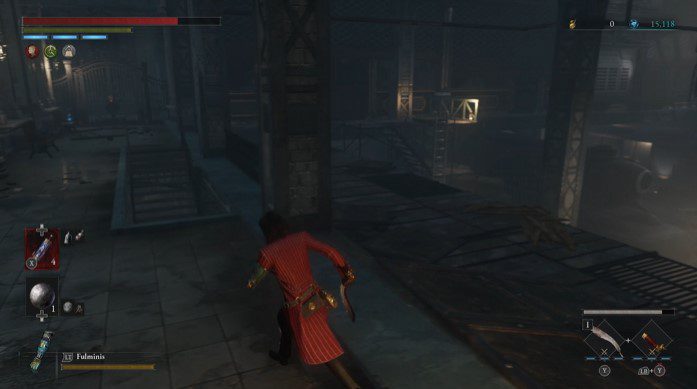
Once you’ve grabbed those head back up the ladder at the far end. Take a left and then circle around. Remember the beam from before? Drop down the gap and destroy the infected there, being sure to pick up 1x Chain from the ground.
Further down the platform, be mindful of the infected dangling from the train carriage to the left, and let the armless infected shuffle out the train, goading it out into the open before killing that too. Head onboard the train.


Move up the carriages, taking out the infected. There will be new infected here too. These little critters are annoying and will jump at you with tentacles. It’s got a ton of health but it is weak to fire, so use this to your advantage. Just left of its spawn point you’ll find 1x Shot Put.
Exit the train and take a left to begin with. Destroy the egg-sacs to eliminate the Decay in this area and grab 1x Special Purification Ampoule on the way. There’s also 1x Radiant Ergo Fragment at the far end too.
Turn around and take out the infected puppets on the other side of this platform and grab 1x Fable Catalyst. Climb the stairs and head over to the door, unlocking it so we have a shortcut back to this spot. This is the door on the other side of the beam fronted by boxes.
Turn around and head all the way down the corridor. You’ll find 1x Radiant Ergo Fragment just to the right of a larger infected brute lurking about. Behind it, head down the ladder and immediately turn back the way you came. Slip down to the lower level, take out the two infected and grab 1x Dim Ergo Fragment.

Turn back and this time, head into the Decayed area next to it (with the green mist). Destroy the egg-sacs to get rid of the Decay as you move along the platform. You’ll find 1x Resplendent Ergo Fragment and just next to that, behind breakable boxes, 1x Special Purification Ampoule. There’s also, at the far end of this area, 1x Radiant Ergo Chunk, just next to an infected.
Return the way you came and move up the platform, past the train until you reach a much larger arena section.

There’s a menacing Infected Scorpion here that plays out like a mini-boss, although in truth it’s actually not too difficult. It’s weak to the side, in front of the lower limbs, and also on its rear too, although be mindful of it using the tail as a weapon here. It tends to favour big, strong attacks and it’ll jump around the arena a lot.
However, if you can inflict shock or burn damage, it’ll whittle away at the health pretty quickly. Defeating it will net you 1x Murderer Puppet’s Amulet too. Before you do anything else and explore this area, head up the ladder at the far end of our starting position on the left and follow the path along to the metal ramp. Don’t take a left just yet but take a right instead.
At the end of this corridor, you’ll find a lock we can eliminate, linking back up to the earlier Stargazer. There’s also 1x Special Resistance Ampoule on the bench to the left. The reason for doing this first before exploring, is if you do end up dying, you don’t have to walk a mission to get back to the area we’re in now!
Back in the arena where we faced the scorpion, head to the back of the arena and grab 1x Special Resistance Ampoule from the deceased lady in white on the ground.

Head on the train carriage and we’ll be in very familiar territory. Take out the infected all the way along, and slash at the barrier at the back of the chair to proceed further.
At the back of the train car, you’ll find evidence of Geppetto’s handiwork, and the ability to upgrade your tools or switch your Legion Arm on the fly, which is super handy. Just to the right of this is Letter from Someone Who Has Gone Ahead. The safe at the very back of the carriage will also have LADA Break Cartridge inside.
Now, climb back up the ladder again and this time, descend down the metal staircase next to the door we’ve just unlocked. Circle around under the metal stairs at the bottom and pick up 1x Dim Ergo Fragment. There’s nothing in the open train carriage this time.
Turn back but don’t enter the door to our right just yet. Instead, proceed forward and grab 1x Chain. There are a few more of those pesky Infected down here too, so be mindful of them popping out and stopping your progress.

Defeating all of these, you’ll be rewarded with a chest at the far end holding 1x Master Chef’s Knife Blade and 1x Mater Chef’s Knife Handle.
Krat Central Station Lobby
Now we can proceed through the door to our right. Head up the staircase and at the top, grab 1x Resplendent Ergo Fragment. Be careful though, as an Infected will drop from the ceiling and hit you for splash damage.


Now, there’s a choice of proceeding forward or heading up the staircase to the right. Going up the stairs leads to more infected, but at the top of the next section, circle around the jagged edges of the room and grab 1x Vivid Ergo Fragment.
Drop down through the gap and proceed through the door ahead and we’ll have an optional boss fight on our hands.
Optional Boss – Robber Weasel |
||
|
The Robber Weasel plays out very similarly to previous human enemies we’ve faced before. This guy favours an axe and hits with three-strike and four-strike combos. He also has a move where he’ll throw daggers if you’re too far away to try and stun you. If that wasn’t enough, he’ll also hurriedly back up as soon as you get one or two strikes in to hit the guy. The best time to hit though is actually after his Fury Attack. This will see him launch across the battlefield and slam his axe down in front of him. Use this opportunity to get in behind and hit with a Fatal Strike. As for dodging his blows, you’ll want to try and dodge back the first two blows and dodge-roll through the third or fourth (depending on the combo) to get extra strikes in. A good idea is not to kill the infected leech from the previous room. If you can, goad that into the room and back up away from Weasel. During the time where the infected leech will attack Weasel, you can get in and hit for three or four bonus blows without retaliation. When Weasel gets down to 50% health, he’ll will start coming at you with more speed and aggression. The combos will come thick and fast so be ready to dodge. You can stun with Shot Puts if you wish, while an upgraded Puppet String is a good option too. Eventually it’ll go down, and reward you with some goodies. |
||
| Rewards: | ||
| 1x Robber Weasel’s Mask | 1x Robber Weasel’s Hunting Apparel | |

Head up the staircase behind Weasel’s location (also note you can actually run past Weasel and avoid this fight altogether if you wish) and defeat the infected there.
At the top of the stairs, head into the doorway to the right and grab 1x Resplendent Ergo Fragment. You’ll also find a new variation of Infected standing by the desk we originally found a Collectible in Chapter 1 further up this balcony section.
It’s quite easy to take out, but be mindful of its attacks, which are very front-heavy. Dash back, wait for the combo to finish, then get up close and slash. It favours a lot of big, thrashing strikes forward, so dodge-roll to get behind it or dash back to avoid the strikes.
Behind that desk you’ll find 1x Fable Catalyst.

Keep moving along the path and turn to the left at the end of the hallway. Destroy the yellow butterfly and collect 1x Stabilized Alchemical Booster. At the bottom of the next staircase is 1x Cat Dust. Move through the door to the left and derstroy the two infected puppets. Still in this hallway, you’ll find 1x Legion Magazine by the corpse.
In the bathroom we originally found a Thermite in Chapter 1, you’ll now find 1x Dark moon Moonstone of the Covenant and another infected puppet in the cubicle.
Take this guy out and return to the previous hallway. Head all the way down but when you reach the door heading out toward the Town Hall, instead turn to the left and go and repair the Stargazer.

Before heading outside though, you’ll find a Trinity Door to your left through the doorway. Once all this is done, head outside and prepare for the next section.
Krat Central Station Plaza
We are now back in the Station Plaza, and there are a good number of infected puppets around out here. Thankfully, the layout is generally the same as the last time we were here so it shouldn’t be too much trouble to backtrack. On the left, pick up 1x Legion Magazine.
At the very back of this area, toward the chest at the back left of this plaza, you’ll find 1x Thermite. Inside the chest, guarded by a strong puppet wielding a huge bat, you’ll find 1x Coil Mjolnir Head and 1x Coil Mjolnir Handle.
Moving around the plaza in a clockwise fashion, you’ll find 1x Dim Ergo Chunk by the fallen statue.

Behind the large brute, there’s 1x Acid Canister, and just over by the buildings you’ll find 1x Gemini’s Emergency Protection. Once you’ve grabbed all this and dispatched the puppets, head up the path to the back right of this section, leading on toward the City Hall.
Keep moving along the street, and eventually you’ll find another infected miniboss pounding on a door. Behind it, at the far side of the alleyway, grab 1x Half Moonstone. Watch out for one of these leech infected though!
This is a compulsory mini-boss in order to open the door to progress forward, so a good idea is to use the elevated walkways to get the jump on this mini-boss. Quite literally. Dropping down and slashing at the end of one of its combos is an excellent choice, while you can safely use Fulminis, Puppet String or Flamberge up here and do extra damage.
The tactics are similar to the pillar trick, but watch out for the Fury Attack, which sees its spiked claws reach out and they can get you, even with it caught on the wall below.
Defeating it will net you 1x Legion Plug and the door it was originally pounding on, now open. Head inside and repair the Stargazer.
Abandoned Apartment
From this new location, head up the stairs and you’ll find a vendor and a collectible on the table, Fairytale of the Three Brothers of the Workshop Tower. When you’re ready, push open the double-doors and we’ll be in a brand new area that has been ravaged by the infection.

In this next section, you’ll not only have to contend with infected puppets and falling to a cheap death, but also Disruption too. There are numerous crystal shards dotted around that inflict Disruption and you need to destroy these, while also coming equipped with plenty of Ampoules to negate Disruption’s ability.
From your starting position, head all the way to the right, where you’ll find the first aforementioned crystal and two infected. There’s also 1x Resplendent Ergo Fragment too.
With that collected, turn back and cross over the fallen sign by the lamppost. To your right on the other side, you’ll find Lover’s Letter next to another crystal.

Proceed to the left along this pathway, taking out the crystal and letting the infected come to you before taking it out. The passage is a bit narrow here and you can easily fall off the edge.
With that defeated, continue all the way to the far end of this path and turn the corner to pick up 1x Shot Put. Cross over the next small walkway to to the left (there’s nothing further on this side) and immediately destroy the crystal next to the pathway.

There’s another crystal just to the left of this location too with another infected so be sure to dispatch both of those. You now want to move under the archway to the left into a new area (pictured below from afar).

In this new section, there are several dog enemies that dispel Disruption clouds. In the middle of their location, you’ll find 1x Resplendent Ergo Fragment.
A good idea is to try and lure the dog enemies away from the central area with the two Disruption Crystals, use a Resistance Ampoule too and try to take them out quickly before they give off too many clouds of Disruption.
At the end of the pathway, turn left and destroy the next crystal. You’ll be on the opposite side of the street now and will be able to grab 1x Radiant Ergo Fragment.
Turn around and head up the far ramp, next to the lamppost. On the way up this path, pick up 1x Saw Blade. Just to the left, around the corner, you’ll also be able to get 1x Attribute Resistance Ampoule.

When you’re ready, head to the end of this pathway and turn right. You’ll find another larger infected brute marching around and just before that, a Butterfly holding 1x Balance Crank.
There’s a pathway leading either straight on or to the right, back whence we just came. Head all the way to the right and unlock the door. This links back up nicely to the Abandoned Apartment Stargazer and prevents a fair amount of backtracking too, which is handy.
Turn left after unlocking this gate and head into the abandoned house. You’ll find 1x Vivid Ergo Fragment in here just at the bottom of the stairs. Up the staircase and back outside again, you’ll find 1x Special Purification Ampoule behind some boxes and next to a disruption crystal.

In the next house along, you’ll find another compulsory mini-boss. This infected plays out similar to the one in front of the cathedral, but it has brutal attack combos and it’s incredibly quick too. Your best bet here is to use Flame Blitz and Flamberge to get it into a burn state and help chip away at its health.

The area is pretty tight in terms of room so you want to try and dodge and parry as much as you can. It also inflicts Decay with its attacks, so keep an eye on the state of your weapon here. Eventually it’ll go down and you’ll earn 1x Arch Extra Heavyweight Frame.
Destroying this foe also removes the black webbing blocking our path forward. Grab 1x Motivity Crank and head into the next area, grabbing 1x Radiant Ergo Fragment from the corpse as you do.
Turn the corner and there’s also 1x Resplendent Ergo Fragment around the corner on the far pathway (pictured below).

Collapsed Workshop Tower
Continue up the stairs and at the far end, repair the Stargazer. From the Stargazer’s location, head inside and take out these tough enemies and immediately go up the stairs. Grab 1x Fable Catalyst from in front of the table and then up the next staircase, picking up Primer for Workshop Technicians from the table.
Behind you, there will be a destroyed wall that you’ll be able to head outside on. Hug the wall and be careful not to fall as you follow the tight rooftop path along.

On the way, you’ll find a flamethrower puppet to take out. You need to be quick in doing so and blast it with Fulminis to try and stagger quickly. You do not want to get caught in that flame path!
Head back inside again at the end of the pathway and immediately drop the ladder. This will link us back up to the earlier Stargazer outside the Workshop Tower.
Deeper inside the tunnel, just to the left of this ladder, you’ll find a big workshop room and another ladder leading to a higher level. Unfortunately, there’s a tough boss here that you’ll need to contend with.
Boss Fight – Walker of Illusions |
||
|
Walker of Illusions is a tough foe and actually plays out slightly similar to the sword-wielding goon we faced at the Grand Exhibition. It’s very clearly another of those failed experiments, but the Walker is a very tough customer and can punish you if you’re not paying attention to the moves and combos. There’s a four-strike combo, where it’ll lash out and end with a knife-strike into the ground. A double-strike where it’ll scuttle forward and hit the ground twice with its knife, and a six-strike combo ending with a Fury Attack, which will do massive damage if caught. There’s also another combo where it’ll spin multiple times and lash out in both directions with its sword and knife. If that wasn’t enough, it’ll use a grab attack similar to the Boy Puppet but this time stab you three times and then push you to the ground. All the while, it’ll scuttle backward and forward across the arena. The worst move by far is its Clone Illusion, which it’ll use at around 50% health of so. Here, Walker will back up and conjure up a clone of itself. It has a smaller amount of HP but it uses the same moves and hits just as hard. It’s a tough foe to take out and worse, the original Walker will start using a Siren blast at this point, sending a shockwave of Disruption out on occasion. When the clone shows up, you want to focus your attention on taking this out as quickly as possible first before turning toward the Walker. Getting caught with two Walkers for an extended period of time is not fun. Make sure of dashing around the arena in this fight too, so you can avoid some of these spinning slash attacks. Using Flame Blitz just before, and using a “restore HP” Wishstone is also a great shout here. If you’re really struggling, you can also stock up on Thermite and use this against concentrated pulses of Flamberge, but be careful as Walker is very quick and can catch you out in one of its combos. The best time to hit is after the two-hit knife combo into the ground, and the four-strike combo later on in the fight. Don’t get greedy and attack too aggressively though, but there is a high chance of staggering this foe if you use a strong attack at opportune moments. The trick with this fight is learning the attack combos, dashing around the arena in circles, and using dodge-roll to move through the attack combos. You won’t be able to use a Specter here, so if you have been up until this point, this may be more of a challenge for you than others but stay patient with this one as it will eventually go down. |
||
| Rewards: | ||
| 1x Legion Caliber | 1x Dark moon Moonstone of the Covenant | 8157 Ergo |

With the way now clear, head through the doorway and lift the lever on the elevator. When you step out, you’ll receive word that the hotel is under attack and you need to hurry. In the street, follow the linear path along and collect 1x Thermite and 1x Half Moonstone on the way.
Krat Central Station Street
Up the stairs, you’ll find another Stargazer. Now, you won’t be able to teleport for a while so there’s no way of stocking up on gear at Malum District.
Our destination here is up the stairs to the bridge, but instead of going in that direction, head toward the infected leeches. Take them both out and head under the arch to the right.
Back outside again we’ll be in familiar territory by the cliffs overlooking Hotel Krat. To the left, you’ll find a phone with another riddle (tackled in a separate guide) and a further pathway on the right.

There’s another tough infected puppet on this side and several disruption crystals. Take all of these out and continue down to the far end where weearlier had a great view of the hotel. There, you’ll be able to pick up 1x Half Moonstone from the ground.

Head back up the path and turn left. Follow the street all the way around, taking out the puppet banging on the door. You’ll find 1x Resplendent Ergo Fragment on the ground under the blue crystal. Go up the stairs and pick up 1x Gemini’s Iron Protection. Drop down, and you’ll be back at the Stargazer again.
From this location, go up the stairs and toward the City Hall. Before climbing up the stairs, continue on the path to the left and grab 1x Dim Ergo Chunk.
Corrupted Parade Master
Boss Fight – Corrupted Parade Master |
||
|
Corrupted Parade Master is an enhanced, suped-up version of the earlier Parade Master fight, and this time there’s no way of coming stocked up with throwing gear or calling on the Specter for help. The fight itself is pretty challenging, but it’s worth bearing in mind that the Parade Master can be burned, so using Flamberge and Flame Blitz on your blade are great choices. The move-set is similar to the earlier Parade Master fight too. It’ll use the mace to slam down twice to begin with, one from the left and then from the right. Dodge-roll through both of these. It’ll also spin 360 degrees and attack around itself too, depending on where you are in the arena. It tends to inflict Decay damage through a few different moves too, including a straightforward spray infront and from conjuring infected goons on the battlefield, which will explode when killed. The Big Splash attack is back, but this time it’s learned some tricks from the King of Puppets. It’ll use the tentacles to flail out infront and around. However, it’ll also use a variation later on where it’ll push forward with its fists four times before rising back to its feet. When it has 50% health or less, it’ll start running around the arena, charging toward you by using its mace to sweep the battlefield. The trick here is to watch the feet. It tends to do two staggering hops before swinging its mace so you should be able to dodge this after the second strike. And through all of this, there’s a big Fury Attack where it’ll pierce forward by turning its other arm into a shield or a sword. Come equipped with Urgent Repair Tools, if you have any in your possession, as if you’re caught with Decay, your weapon can deteriorate quickly. Try to come light with equipment if you can, so you’re only “Slightly Heavy” in order to use our tactic for defeating Corrupted Parade Master. For the first half of the fight, use Flame Blitz and Flamberge to burn Corrupted Parade Master. This first part of the fight is definitely manageable. It’s not too quick and its moves are well orchestrated. You can easily chip away at a lot of health and the Flamberge is excellent to get the infected goons caught in the blast too. When it’s down to 50% health, you now want to use dash to run around the arena to avoid some of the nasty strikes. Dodge-roll through the mace strikes, and when it does the big splash, dash away and wait for the four fist strike to finish. When it does, get in nice and close and attack either with a strong hit or a few light strikes. Back up and repeat. This way, you’ll avoid the bulk of damage and it’ll be goaded into using this splash, which it can’t retaliate from while climbing to its feet. It does take a while using this method but it works an absolute treat to take it out without inflicting too much damage. Just be sure to equip your stamina amulet when you do this! |
||
| Rewards: | ||
| 1x Legion Caliber | 1x Dark moon Moonstone of the Covenant | 8157 Ergo |

With the Corrupted Parade Master down, head all the way back to the Hotel via the linear pathway. There aren’t any other collectibles here so just keep moving for the hotel. When you’re ready, push open the doors and prepare for the penultimate chapter.
<< Barren Swamp |
Relic of Trismegistus >> |
You can check out our full walkthrough and game guide here! |
|