
Sea of Stars Guide – Mirth / Jungle Path
Mission List (Tap to jump down the page!) |
||
Mirth |
||
Jungle Path |
Town of Mirth
The next section of the game isn’t too long but it can be lengthened depending on if you want to head off and complete some side quests and revisit old areas. With that in mind, exit the town and head north along the world map. Enter the Ancient Crypt and talk to the Cryptwalker.
After, be sure to collect 1x Rainbow Conch from the chest hidden behind the pillar on the right. There’s not much to see at the crypt in truth, but it is a lovely tribute, full of statues and monuments to honor high backers of the game on Kickstarter. Feel free to have a look around but when you’re ready, return to town.

Garl will agree to call the town Mirth, before the Headmaster shows and decides he’s had enough. He’s no longer going to be part of this fight. However, he does hand over a Coral Hammer, which will be useful for the areas coming up.
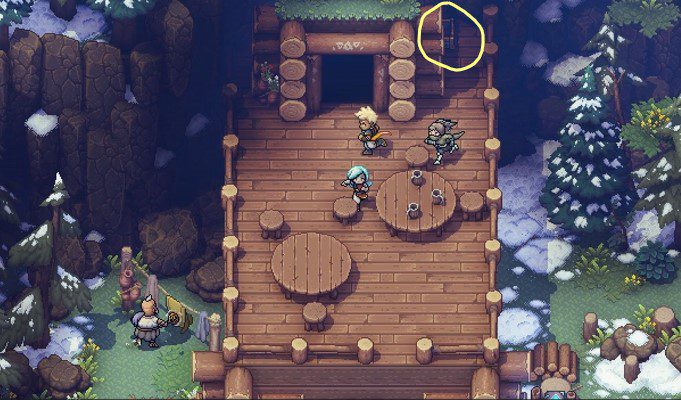
Head over to the save point in town and enter the tavern just left of this. Walk up the stairs at the back of the room and out onto the balcony. At the back of the house on the right is a chest holding 1x Rainbow Conch.
After exploring, head back down to the dock and speak to Hortence, who will teach Sera an ultimate attack called Vespertine Cannons. This is now going to be a summon attack we can use in battle. It also does a good chunk of damage too!
When you gain control of the Vespertine again, there’s a few different places we can go. For the purposes of this walkthrough, we’ll just be following the main path but among the places we can return to, including the Solstice Shrine and Mooncradle. For now, head toward the marked star on the map.

Jungle Path
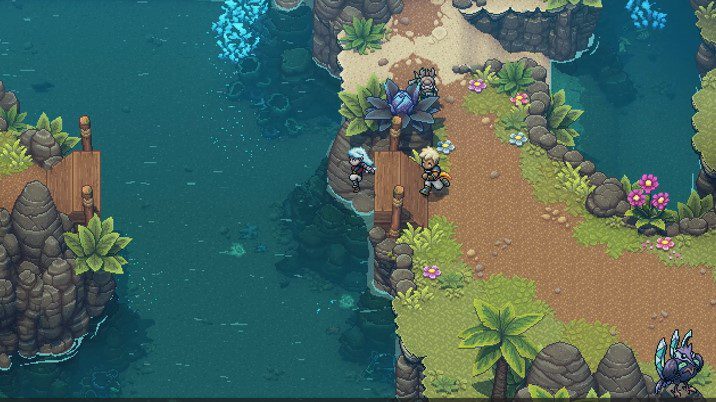
When you arrive on the island, Serai will update you on where we are at on the adventure. This is Watcher Island and we need to find the lost city of Docarria. Uuse the save and campfire.
Left of our location is a chest in the water holding 1x Sapphire Ore. Staying in the water for now though, if you swim all the way to the far left and then head up, there’s another chest here holding Question Pack #4.
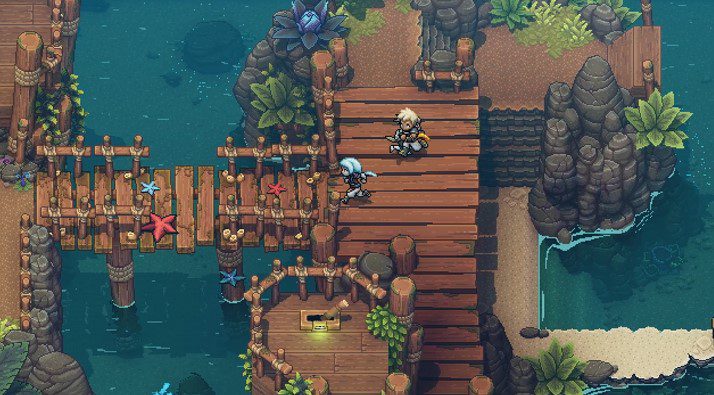
From the campfire and save point, head north east. There will be some new enemy types to contend with, and a couple of familiar ones too. When you reach a broken bridge, jump into the water and swim to the other side.
Don’t worry if the current pulls you down against the wooden logs, climb up onto the sandy platform on the left. Go up the stairwell on the other side you’ll notice a switch at the end of this pathway. Go ahead and pull the lever.
This will allow us to progress further to the left with a new bridge rising up from the water. Ignore the wind turbine mirrors for now, there’s no use for them at this point. Keep moving along this pathway, taking out the two bird enemies that try to ambush you in the process. Eventually you’ll reach a large area with more mirrors and what looks like a Solstice Puzzle. However, we can’t use any of this right now until later in the game.
Instead, head toward the waterfall and jump off the wooden log sticking out the ground. We essentially want to use the current to take us to our next platform, without going so far that we tumble down the river and back to our starting position.


Jump off the log, and swim close to the middle of the lake, just south of this. Climb up the beachy area and progress along the log. After climbing the vines, don’t go all the way up and instead stop halfway. Shimmy across the rock wall and head deeper behind the waterfall (pictured below). Inside you’ll find a mural on the wall which happens to hold another story for Teaks, and will net you 1x Stone Tablet Piece.

Next, head up to the top level and progress along the linear path. When the area opens back up again, you’ll notice a campfire and save point. Rest up and cook what you need as we have another boss fight coming up! There are also a number of ingredients dotted around so do be sure to collect all of those up so we can make more meals.
The next section is a simple platforming area, but do note that the currents will push you down if you mistime your jumps into the water and over. Eventually you’ll make it to the other side. Progress up the platform and you’ll be faced with a tough foe or two.

Boss Fight – One & Three |
||
|
This fight serves as an appetizer for a much tougher battle further on down the line. One and Three have some unique attacks but there’s a couple of tactics we can follow to mitigate the damage these guys can do. The best tactic to begin with is to only target Three. As you’ll notice during the fight, One holds a sword and shield. While charging his move, One will hold his shield up and counter anything you throw at him so ignore him for now. In terms of attacks, One will hit you with a Sword Stab, while Three will swipe at you with his claws twice. Try to block but be mindful that it’ll hit two separate members of the group, with two strikes each time. One’s big charging attack is called V-Attack, which will see One and Three team up together, with Three slashing wildly through two party members. In terms of strategy here, there’s not much to it but be sure to only target Three and use your Combo: Mending Light and any Mooncradle Fish Pies you may have to make your life easier. Once Three goes down, the fight is super easy and Serai’s Ultimate move can come in handy here as well, dealing a substantial chunk of damage. |
||
| Rewards: | ||
| 3114 Experience Points | ||

After the fight, One and Three will leave, and you can progress up through the doorway to exit Jungle Path.
<< Maelstrom Point |
Docarria >> |
You can check out our full walkthrough and game guide here! |
|