Alan Wake 2 Guide: Local Girl
A Quick Message
Strap yourselves in because this is a long chapter. In fact, we’d wager this is going to take a solid couple of hours of your time to get through – and that’s just focusing on the main objectives. There’s another 45 minutes on top of that at least for collectibles. Exploring thoroughly, solving every single and doing this at a casual pace is probably going to take you a lot longer.
With that in mind, we’ve got everything covered in this one post. And it’s a long one. In fact, the finished article has come out at around 4600 words! At the end of this long page for the main walkthrough, there’s a separate section for the additional collectibles that require backtracking after grabbing key items and reaching previously inaccessible areas.
Otherwise, just like before, the guides will include all collectibles along the way.
Heading For Watery
After the cutscene with Alan and Casey, you’ll be in control of Saga. Exhaust all the dialogue options, and make sure you’re up to date on your Plot Board and Profiling too before exiting out the door.
Proceed forward but before heading outside, turn right at the reception and walk a little further into the lounge to collect 1x Coffee World videotape. If you get close to the TV on the wall and walk slowly down the hallway leading to rooms 205-208, you’ll also ping Tapio’s Weather Report on the radio too.
Head outside and all the way down the linear street into Oh Deer Diner. You’ll unlock 1x Ahma Beer Commercial in doing so. After, head back to your car and drive to Watery by selecting the option next to the car door.
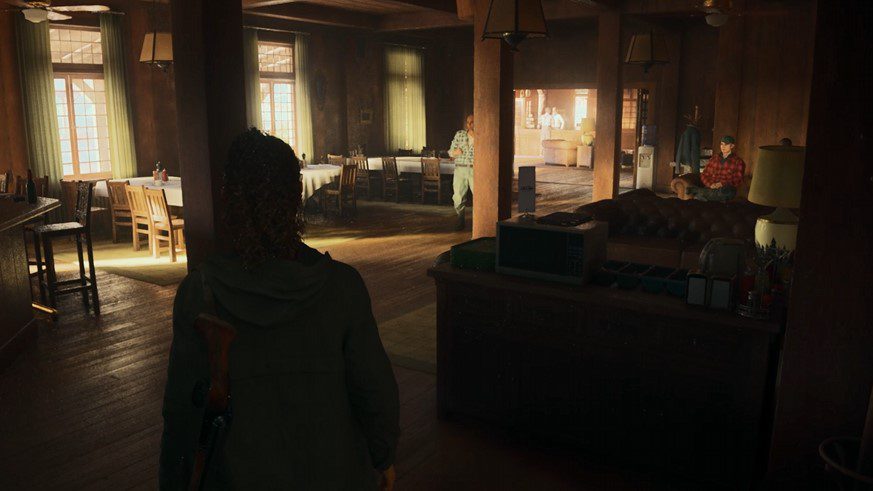
Watery
When you gain control of Saga, immediately head into Suomi Hall to the right (pictured below)

Immediately turn to the left when you enter and pick up 1x Map of Watery. You should also ping 1x Ahti – Yoton Yo on the radio too. You can speak to the woman in the audience and also check out the leaflets on the wall but make note of the Break Room beyond.
Save, replenish your supplies and then head on out the door. Outside Suomi Hall, speak to the man by the Valhalla Nursing Home bus.

Exhaust the dialogue with Vladimir and he’ll point you in the direction of Ilmo and his brother, who have keys that we need. From the van, head forward past the Road Closed sign and keep an eye out for the pair on the right, just before the road ends with roadworks (pictured below).

After speaking to Ilmo and his brother, whom you may recognize from the quirky commercials around town, they’ll give some dialogue that doesn’t seem too useful at first glance. When you’ve exhausted these options, head into the Mind Place and Profile the Koskelas.
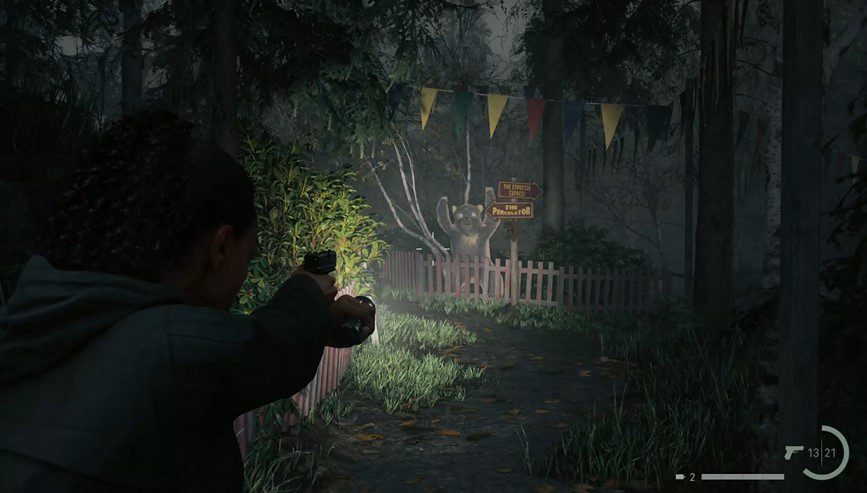
Exit out afterwards and select the dialogue “I’d like to see “my” trailer”. Ilmo will admit that he has keys… but they’re over in Coffee World, a theme park centered around coffee.

The Koskelas will move aside and allow you to pass round the scenic route to Coffee World. Step over the wooden boards on the ground and follow the path along. Open the red box to grab some bullets.
As you approach a left-turn, be careful of being ambushed by enemies. Destroy the two Taken and continue up the path.
When you reach a fork in the road, take the path on the right, flanked by two large rocks on either side.

At the far end of this path, you’ll come to a big tree in the middle of the pathway. Go just left of this location and you’ll find a Nursery Rhyme. Grab 1x Deer Doll and 1x Moose Doll (just to the right of the Deer Doll on the ground). Place the Moose doll on the tree. Be sure to pick it up after and head back along to the main path.

At the base of the Moose Statue, you’ll find 1x Coffee Mug Charm.
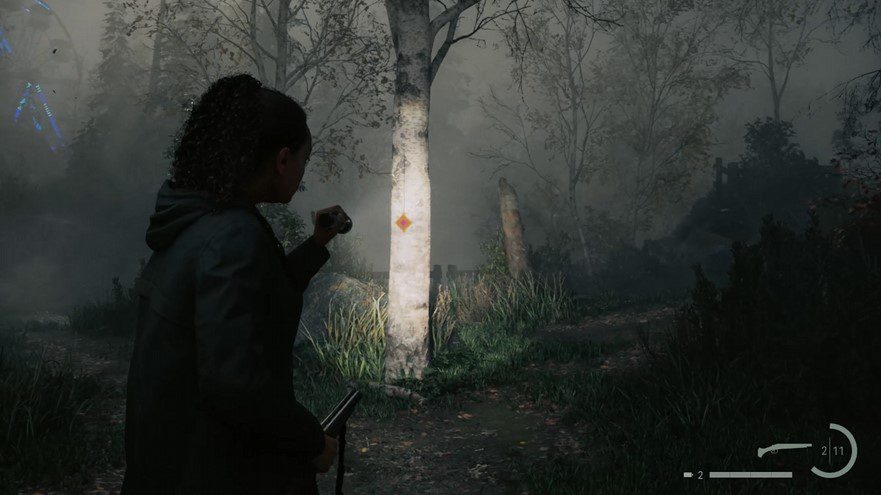
Return to the main path and head up until you reach the Map sign (pictured below). At this point, turn and head right. You’ll notice more of the Cult symbols on the trees to show the path up to another Cult Supply Box. Complete the rhythm and open it up to grab the goodies inside. On the way back, be sure to pick up 1x Manuscript Page from the ground.

Hunting Shack & Wilderness Path Area
Return to the path round and the narrow path will open up to a much larger area, backdropped by the Hunting Shack in the distance. There’s a Generator to the left which can be used to turn on the power and activate a new Break Room. It’s a good idea to do that.
Opposite the front door, you’ll find another Cult Stash box (pictured below).

The code here can be found via the makeshift shooting range to the right of this location. There are arrows sticking into different numbers. If you don’t fancy solving this yourself, the code is 527.
Inside this box happens to be 1x Crossbow, a very handy weapon to get hold of. If you haven’t already, grab the arrows just right of the box and save at the Break Room. With the lights on now, be sure to pick up 1x Manuscript Page from the table inside.
Follow the path outside back on the main path (open your map if you’re stuck) and you’ll come to a fork in the road. Head to the right first.

At the top of this linear path you’ll find a lamppost with a shining light. Just to the left of this, on a picnic table, you’ll find a cooler holding some goodies inside.
Behind the picnic table, look for a path leading down and immediately turn right once you get there.


Proceed forward and you’ll find another Nursery Rhyme. Place the Deer Doll on the House and be sure to pick up the doll after. Kill the wolves and you’ll find the charm by the dead deer carcass on the ground. It’s aptly titled Deer Charm.
Before returning to the main path, head all the way on the far right of this area and you’ll find another Casey Lunchbox, holding 7x Manuscript Fragments.
Now, return to the main path and head down the path, toward Coffee World.

Take out the enemies on the way and continue along the linear path, down from the broken stairwell and over the bridge. At the next fork in the road, make note of the tree in front of you.
Head right at the tree and Past the picnic tables. Be sure to open the Cooler on the second table though to grab 1x Flare. At the far end of this section, on the floor, open another Casey Lunchbox and grab 5x Manuscript Fragments.
Back on the main path again, follow this all the way along (you can turn right and explore a bit but we’ll be returning back here later with a key item so don’t worry too much for now).
When you climb the final ledge, you’ll notice the outskirts of Coffee World beyond.

Coffee World
This area is quite large and it’s definitely useful to scope the area out using your map, alongside using the signs. As you approach, enter the Break Room and save. Be sure to also grab 1x Manuscript Page from the table.
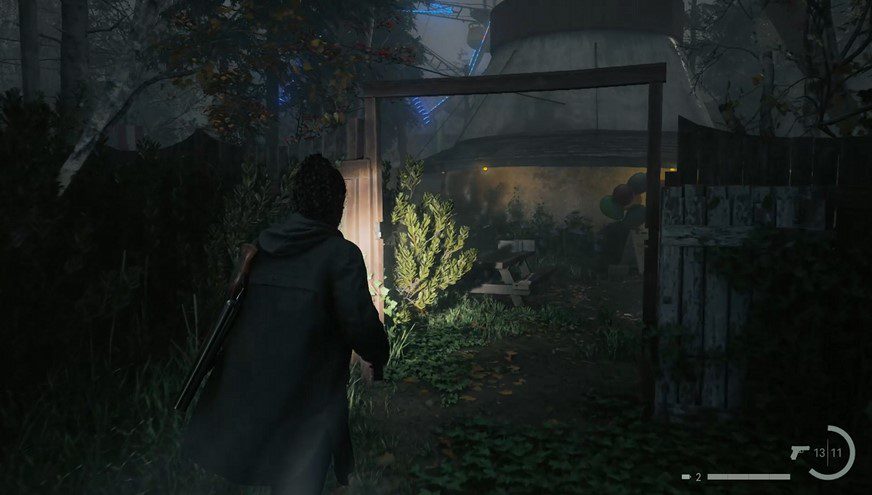
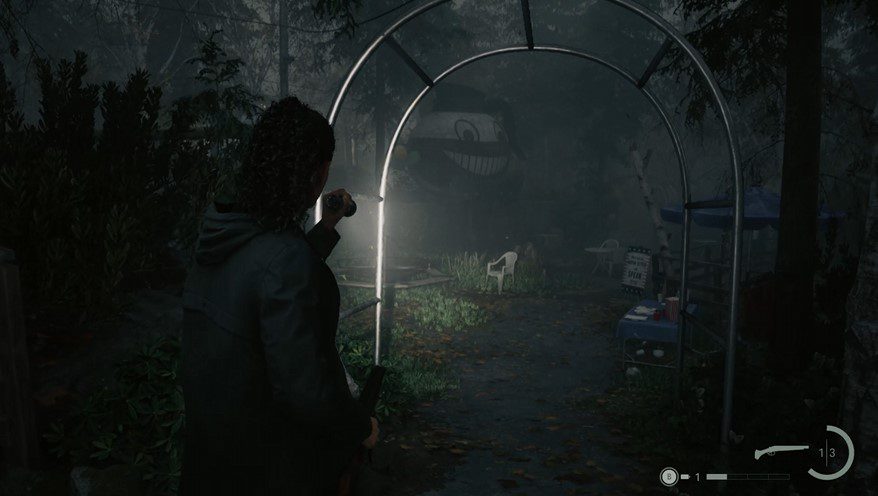
Head outside and under the wooden arch to properly enter Coffee World. Make note of the building ahead (pictured below) as this is the Gift Shop we need to enter.
Get The Screwdriver
Unfortunately, the Gift Shop is locked so we need something to pry it open. Open the cooler to the left and pick up some bullets first, and another further on to the left in the kid’s playground area.
Now, return to the gift shop and circle around to the right. Interact with the noticeboard next to the door and activate both crucial clues to push the investigation further. We basically need to find a Screwdriver to pry open the padlock, and that can be found within one of the rides, the Percolator.
You can follow the signs down but before you do, head up the stairs to the left, just behind the gift shop to the Ferris wheel. There, you’ll find another Cult Supply box at the left of the entrance. The clue is “striped cups”, which can be found in a different location but to save you some time, the code to open it is 147.
Once you’ve done this, return to the Gift Shop location and head along the path that branches in two directions. Before you choose either side, be sure to fire a bullet at the cardboard cut-out of a bear that shows up to ping an easy Achievement, Coffee-Themed Fun (pictured below).
Follow the sign down to the Percolator and make sure your health is stocked up and your gun fully loaded. Inside, two enemies will ambush you. The first will pelt projectiles from the middle chamber, which will rise and fall (pictured below).
The other is a melee goon that will follow you round and try to hit you. Take out the melee guy first, but be sure to keep moving when you do, preferably hitting dodge just before the projectile enemy shoots.

Once these guys are both dead, the ride will stop. Head round to the side and pick up 1x Screwdriver atop the fuse box.

Before returning to the Gift Shop, head back up to the branching path (where you shot the cut-out bear) and head to the right, following the signs down to the Espresso Express. You’ll notice a large menacing coffee mug that looks like it’s just been kicked out of Cuphead.

Head up the stairwell to the left of this giant statue and check the red fence behind. When the fence ends, head round and pick up 1x Coffee World Stash Key. Now, take this key back through to the branching path and follow the sign to Espresso Express.
Make note of the Well, and just behind this, you’ll find a Cult Supply Box. Use the Coffee World Stash Key to open it up and grab the goodies inside. After, interact with the note to gain 1x Picture.

Don’t head to Espresso Express just yet as there’s not anything we can do here until later in the chapter. Instead, head back to the Gift Shop and use the screwdriver on the front door.
Spin round and grab 1x Manuscript Page from the table. Behind the counter on the far side, check out the note for clues on the safe cde. You can figure this out through using the Mind Place Case Board and Profiling but to save you time, the code is 146. When the safe opens, you’ll gain 1x Trailer Park Key.
Now, exit out of Coffee World (following the signs to Espresso Express and then the Exit sign).
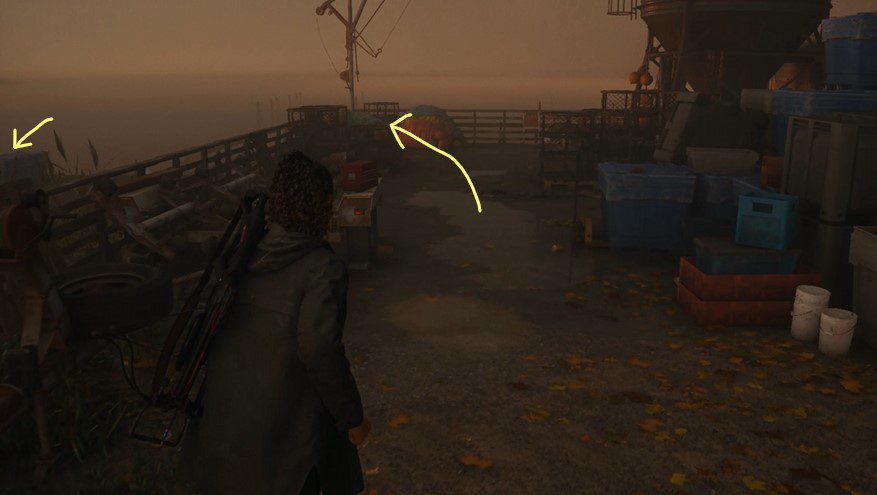
Outside, be sure to turn left and check the coffee pot round the back (pictured below). Inside is a Casey Lunchbox holding 9x Manuscript Fragments.

Watery Trailer Park
Head along the road and toward the Trailer Park. Be sure to head into the Break Room on the right. When you’re ready, head for the Trailer Park and use the Trailer Park Key on the front gate.
When the cutscene ends, head to the left of the brothers to the swing set. Just behind, you’ll find another Casey lunchbox in the corner, behind three thin tree branches, holding 7x Manuscript Fragments.

From this location head across the trailer park toward the white building with 1 on the side. Head in through the front door and toward the lounge, where a comercial will play. More importantly, you’ll bag 1x Parade Floats video too. There’s also a drawer in the kitchen holding 1x Flare.

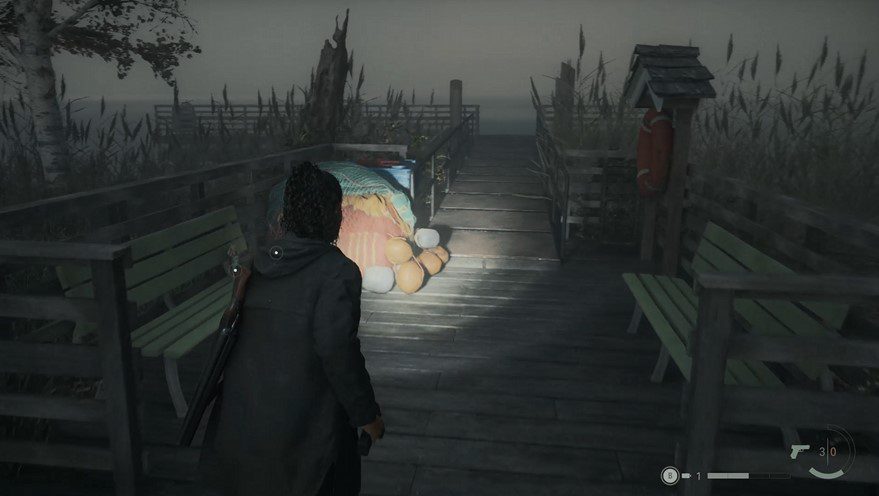
Leave the cabin and head all the way south as far as you can go until you reach the flooded parts of the Trailer Park. With the locked gate (that needs Bolt cutters) to your left, head to the right and into the open backdoor of the house with a wooden porchway (pictured below).

Inside, interact with the kitchen table and then check out the birthday card. Next, head into the bedroom and press X (A) on the table. This will trigger a cutscene.
Kalevala Knights Workshop
When you gain control of Saga again, exit the Trailer Park and save in the Break Room. Follow Mulligan all the way up the road to the Cultist all the way up to the Kalevala Knights Workshop. Be sure to unlock the gate to the right, which leads back into Coffee World.
Before heading inside the workshop, head round the back of the workshop and between the two boats. To the right of the second, smaller boat, you’ll find a Casey Lunchbox with 6x Manuscript Fragments inside.

Head inside the Workshop and proceed forward until you come to an office on the right. Head inside, open the filing cabinets to grab some goodies and be sure to check out the computer as well. One of the emails will mention the combination lock inside “a smiley coffee cup”.
This can be found on the other side of the office to the left. When you head round the back, it’ll line up the symbols perfectly to enter them into the lock combination for the door to the left of the computer.

Go ahead and do this now and open the door. Save up in the new Break Room, and be sure to investigate the Cult hideout. On the table, make sure you pick up 1x Fuse, as you’ll need this later on.
When you’re ready, descend down the ladder and head through the door. Approach the altar and try to interact with the Clicker. A cutscene will ensue and the Clicker will disappear.
Get The Clicker From Mulligan & Thornton
Before climbing back up the ladder, open your Mind Place and Profile Mulligan and Thornton. You’ll learn there was an Overlap in Watery, just like Cauldron Lake. But how to open it? You’ll also gain 1x Manuscript Page here too.
Climb up the ladder and take out the Shadow grunt that will be in the workshop now. When he’s defeated, approach the float and grab 1x Manuscript Page from the ground. Next, interact with each element on the float. There are four in total – the mask, the hand, the victim and the well.
Head into your Mind Place and catch up with all the clues so far. Finally, exit out and check the table to the right of the float (pictured below).

Interact with the paper and grab all four pictures and complete the clues in your Mind Place. In doing so, the task will alter and we’ll need to re-enter Coffee World again.
Collect The Ritual Items
There are four items to grab in total, and three can be found in Coffee World:
Circuit Board Location
The Circuit Board can be found at the Espresso Express ride. Head round to the right and add the fuse into the control panel (pictured below).

With this done, activate the controls to start the ride and again to stop it. Now, climb down into the new passage through under the ride to the other side. Grab the Circuit Board.
Pukkalo Knife
Head back to the Gift Shop and you’ll find the Knife on the outer edge of the shop on the far side.
Cassette Tape
The tape can be found on the way to the Percolator, in the little sideshow stalls. Remember the ominous laughing? It’s coming from behind a cardboard cut-out Coffee Mug. Head round the back, grab the cassette tape and stop that laughter.

The Mask
With all three items collected, return to the float and place the items in their corresponding spots. For the mask, open up Saga’s Mind Place and Profile the Deputies. You may need to add the extra clues into the Case Board to activate this.
Once that’s done, head out the Workshop and grab the mask that’s appeared above the Well. Place the mask on the float and complete the ritual.
Now, approach the Well and descend into the Overlap.
The Overlap
There’s a long, linear loop that ensues from here, keep pushing forward and keep descending the wells. Each time, the level will change slightly. When you reach a point where the well fills up with blood, head along the path that loops around and drop off the ledge. You’ll see flickers of a ballroom as you do.
Now, turn around and crawl under the rock tunnel (located to the left of the spot you jumped down) to the other side and drop down again.
Descend into the well once more and prepare to fight.
Mulligan & Thornton
Boss Fight – Mulligan and Thornton |
||
|
Finally it’s boss fight time and this one, just like the original fight, will come at us in three phases. The Well will turn red and a number of orbs will appear across the arena. Essentially, you want to shoot each one to stop both Mulligan and Thornton from respawning. If you don’t, they’ll just keep coming at you. |

With the Overlap complete you’ll be back at the edge of Coffee World again. And you’ll also be in possession of the Clicker too. At this point, you can head back to Watery and finish the chapter or you can grab the rest of the collectibles in this chapter. If you just want to get on with it, there’s a link below to jump past the collectibles. Otherwise, let’s begin.
Skip The Collectibles
Watery Collectibles
When you leave Coffee World out the exit, head up toward Lighthouse Trailer Park. With the Flooding now receded, there are extra locations we can visit.
Trailer Park
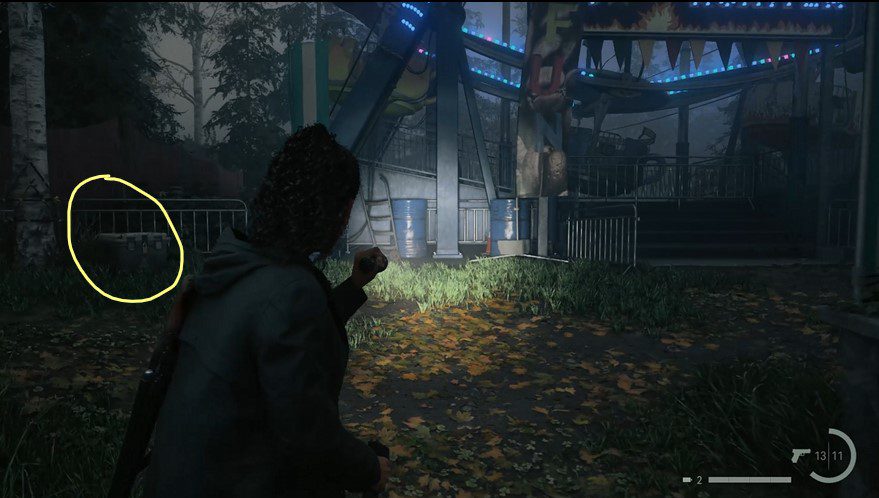
In the Trailer Park, go all the way to the cabin labelled 6 on the left hand side and turn right by the white car to the cabin on the opposite side of the park. You should notice a Cult Supply Box by the blue bin (pictured below).

The key to this can be found just beyond it on the telephone pole. You’ll need to walk up the wooden ramp to reach the top and grab the key. With this, open up the Supply box and grab the gear inside.
Next, turn around and head for the Fish Clean station behind the red truck, further into the Trailer Park.

Here, you’ll find 1x Bear Doll and 1x Wise Elder Doll. Head up to the pier and check the green bench on the left. Grab 1x Mother Doll and 1x Child Doll.
There’s a Nursery Rhyme located further on down the pier to the left. Place the Wise Elder Doll on the Waves and the Bear Doll on the Sweet. Grab both dolls and take out the enemies by the Fish Station. Now you can grab 1x Charm.
Lighthouse Area
Exit out the Trailer Park and follow the road along to the Lighthouse (open your Map for the exact location). It’s the greyed area to the right of the Trailer Park.
Follow the path to the very top of the Lighthouse and grab 1x Trickster Doll from outside. The door is locked, and you won’t be able to open it until we’ve got all the Cult Supply boxes, so don’t worry about this for now.
Descend back down the steps and just right of the lighthouse, you’ll find another Nursery Rhyme.

To solve this, place the Trickster Doll on the Waves, and the Wise Elder on the Eye. Be sure to pick up the dolls after. Now, the location of this charm is actually all the way down at the bottom of the lighthouse, on the road toward Watery. This will net you 1x Lighthouse Charm. We’ve circled and pictured the location below.

On your way down, make note of the pick-up truck on the road. Instead of turning right to go back to the Break Room, go left instead. You’ll know you’re on the correct path when you notice a red box up on the tree. This can be opened with the Screwdriver.
Now, head up the ledge and continue to the right, where you’ll find a Cult Supply box.

The code for this can be found from the glowing symbols painted on the rocks. There’s one marked with III and another with II, symbolizing the second and third markings, respectively. The first can be found just above where the box is.
With the correct symbols in place, open the box and grab the goodies inside. Now, head round the back of this ledge and jump down. Make note of the circled area just left of the Break Room, where you’ll find another Casey lunchbox, holding 9x Manuscript Fragments.

Proceed down the hill and at this point, if you haven’t already, grab the Lighthouse Charm. Next, go all the way along the road back into Coffee World.
Coffee World Area… Again
Head through Coffee World and go straight to Latte Lagoon. If you’re struggling with the location, it’s inside the sideshow area, just left of where we picked up the Cassette Tape for the float.

Go all the way down to the end of the dock and you’ll find another Nursery Rhyme. Place the Moose Doll on the Wave, the Trickster Doll on the Jewelry and the Deer Doll on the Boat. This will cause one of the boats to float onto shore, allowing you to grab 1x Charm.
Ranger Cabin
North of Coffee World, you’ll find the Ranger Cabin. It’ll likely be greyed out on the map, but with the Screwdriver, we can now open up the front door to explore further.

Be sure to open the door to the left though to find a toolbox holding 1x Trauma Pad and some bullets inside. Inside the house, be sure to loot the place before heading upstairs. In the bedroom to the left, you’ll find a file on the table you can examine to gain 1x Picture.
On the opposite side, check out the dresser by the window to grab two more dolls, 1x Maiden Doll and 1x Monster Doll.

Head out the backdoor of the house and now we can solve the Nursery Rhyme. Place the Maiden on the Tree and the Bear on the Heart. To find the charm, go back inside the house, and you’ll find it on the bed upstairs to the right.
Go back into Watery, and depending on what route you take, you’re going to be walking for a while. Thanks to there being no fast travel in this game, and the Ranger’s Cabin literally being the other side of the map, it’s time to get walking.
Back To Watery
Now it’s time to grab some collectibles in Watery. For those who jumped down the page to this section, don’t worry, this really isn’t adding too much game-time and there’s some useful gear here too. First up, head for the pier opposite Suomi Hall, right behind your car.
Go down to the dock and turn left. At the far end of the dock, behind some crates, you’ll find a Cult Supply Box. The code to get in is 496.
With the gear inside grabbed, it’s now time to head back to Bright Falls.
Return 4: No Chance
Yes, this page is already super long and we’re adding another chapter… really? Well, yes, but honestly, Return 4 is super short. When you start, you’ll gain control of Alan Wake and he’s covered in blood. Exit out the room you’re in and head out the back door.
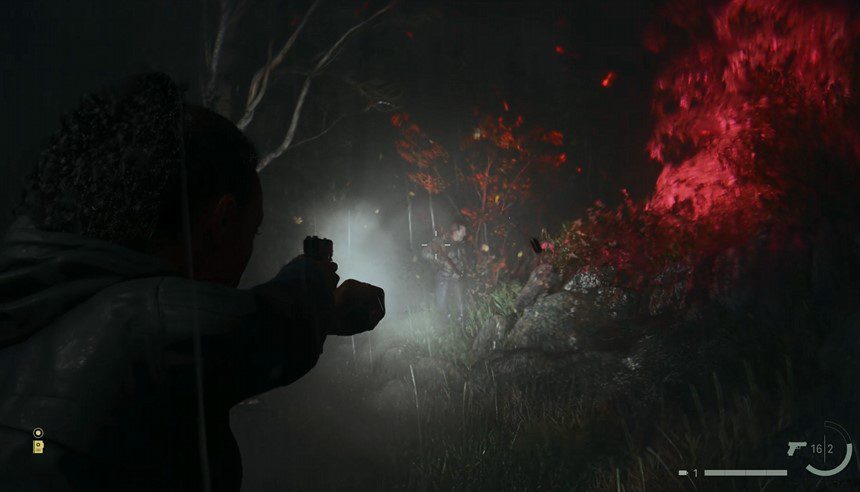
Grab the gun and the flashlight, and head left toward Casey’s shooting in the distance. Hold R1 with your flashlight to get rid of the orbs and you’ll be attacked by a Taken.
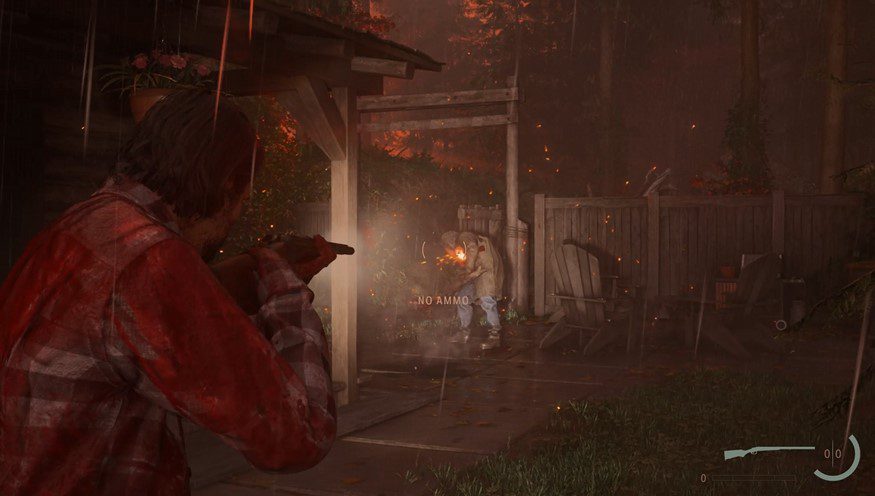
The idea here is not really to defeat every single enemy but to incapacitate this guy enough that you can rush past to the first lamppost. Lure him in deeper to the exterior of the cabin then rush past to the first red box. Open it up, grab more bullets and take him down.
Next, continue on the path forward, from light to light, until you reach the bridge. A cutscene will trigger and we’ll be back in Saga’s shoes again. Well, that didn’t last long playing as Alan did it? Now, this officially starts Return 5: Old Gods (although it hasn’t flashed up on the screen yet).
There’s a Break room just ahead to switch things over and given how long this chapter is, we’d recommend changing to Alan Wake at this point to mix things up. Cross the bridge, enter the Break Room and grab 1x Manuscript Page. Now, we’re going for the puddle and changing over to Alan for a bit. If you want to continue with Saga, tap the link to our full walkthrough below and jump to Saga’s next chapter, Return 5.
<< Initiation 2: Casey |
Initiation 4: We Sing >> |
You can check out our full walkthrough and game guide here! |
|