
Lies of P Guide – Malum District
Mission List (Tap to jump down the page!) |
||
Spiky Infected Brute (Boss) |
||
Black Rabbit Brotherhood (Boss) |
||
Malum District Town Hall |
Malum District
From the repaired Stargazer, go and speak to Red Fox and Black Cat. They’ll be surprised you made it out of Venigni Works in one piece and offer to team up and take out the Black Rabbit Brotherhood. Should you accept, these two will tail along behind you, very obviously using you to dispatch the Brotherhood but no matter, these two are competent enough fighters and very useful.
Head up the staircase behind them and turn left.

Keep moving along the linear pathway, dispatching the infected behind the iron gate to the right if you wish. Keep your eyes peeled though as another will crash out a glass window to the left further along. As you turn left, you can sneak up behind the infected and get a Fatal Strike in. There’s also a projectile enemy that will show from the iron gates.

From inside the blown out iron gates, grab 1x Vivid Ergo Fragment. A little further alojg the path, you’ll find a ladder to your right. Climb up and grab 1x Hidden Moonstone.
Inside the house ahead is a Maiden Infetced, a large brute that will swing around a little birdcage and deal big damage. You’ll gain a Star Fragment for taking this foe out, and it’s also weak to flames too, so be sure to add that to your blade from the grinder.

Before you head up the stairs, walk into the adjacent room. Inside is 1x Sharp Pipe and 1x Vivid Ergo Fragment. Be careful though as there are wooden panels that will break and send you into the basement.

It’s worth going down here though because after dispatching a few enemies, you’ll find a chest holding 1x Arch Break Cartridge. There’s also a collectible called Have a taste of La Leiwies next to an infected corpse.
Follow the stairs back up again and this time move to the second floor. Move along the outside area and back inside again. Before falling down the gap, dodge-roll through the collapsible boxes and grab 1x Motivity Crank.

At this point, Red Fox and Black Cat will tap out the fight and you’ll be left alone for what’s to come. Climb down the ladder, grab 1x Chain and dispatch the infected. Outside this house, you’ll find yourself in a big courtyard with a menacing spiky brute pacing about.

Although this is optional and we can run around this guy, it’s worth taking him out for practice of the big boss in this level. Oh, and its reward is an excellent and very useful amulet too.
Spiky Infected Brute
Mini Boss – Spiky Infected Brute |
||
|
This is a new version of the Infected and Brute enemies we’ve faced so far, and it has some pretty menacing and brutal attacks to boot. For the most part, it’ll attack with its arms, using the familiar shoulder-barge we’ve seen these enemies use before. It’ll also spin around with both fists, hitting anything that moves. If that wasn’t enough, there’s also front slams and a Fury Attack where it’ll push forward and hit out with both fists. Oh, and a few of its strikes will also inflict Decay as well. Fire is a particular weakness here and you can cheese the fight a bit by goading Spiky Infected over to the staircase, and then dropping down for a jump attack from above. This is also a good strategy to avoid the Fury Attack. It’s worth noting that there are various projectile throwing infected up on the rooftops too so goading the spiky brute to fight over here also avoids having to contend with them as well.
Spiky Infected is weak to fire too, so be sure to add that to your blade and if you’re really struggling. You can also pummel it with a few projectiles too, with Thermite a particular favourite! The other point to note is at 50% health or less, Spiky Infected will become a little more aggressive with its attacks. However, it’ll also have a few respite windows after big attacks where you can hit it with a few strikes. Eventually it’ll go down. |
||
| Rewards: | ||
| 1x Patience Amulet | ||


In the house opposite the burning rabbit insignia, you’ll find a chest holding 1x Quartz. To the right of this, dodge-roll through the cart to break it. Watch out for the bear trap here and collect 1x Radiant Ergo Fragment.
Head back to the house with the Quartz inside and slip down the alley to the left first. There’s a single enemy and also 1x Special Resistance Ampoule. Next, take a right at the doorway. Take a right and all the way at the end of the alleyway, you’ll find 1x Resplendent Ergo Fragment.
Turn around from this spot and head down the alleyway. Before continuing on the path, head up the ladder. Right in front of you, on the other side of this house is 1x Vivid Ergo Fragment.

Take a right at the path from the rooftops and collect 1x Star Fragment, being sure to dispatch the first projectile goon. On the other side, there’s a red butterfly with 1x Balance Crank, a chest next to the other projectile enemy holding 1x Bone-Cutting Sawblade and 1x Bone-Cutting Handle, and 1x Attribute Purification Ampoule from the chimney.
From the chimney collectible, head along the wooden balconies and grab 1x Hidden Moonstone.

Jump back over the gap caused by the infected and return to the original alleyway with the ladder we climbed up. Head all the way to the end and turn right. There’s not much to see here but there is 1x Gemini’s Iron Protection to collect. Turn around and head back, into the hollowed out house with another ladder on the far side of the room.

Climb the ladder and circle around, answering the phone for another riddle. Depending on if you answered the phone in the previous level, your riddle will be:
“I stand tall and proud when I’m young and bold. But I’m short and humble once I’ve gotten old. What am I?” The answer here is a Candle.
After this, continue on and keep moving along the path. Jump over the gap to the left and collect 1x Shot Put. Around the corner you’ll find a beam of wood sticking out with 1x Dim Ergo Fragment on.
Return to the area we originally jumped from and drop down into the courtyard. Approach the gate and unlock it for a handy shortcut back to this area from the earlier burning rabbit bonfire.

However, you’ll also find a hidden route to the right (pictured above), where you’ll be able to collect 1x Vivid Ergo Fragment. Follow the path along and at the staircase, you’ll find 1x Hidden Moonstone.
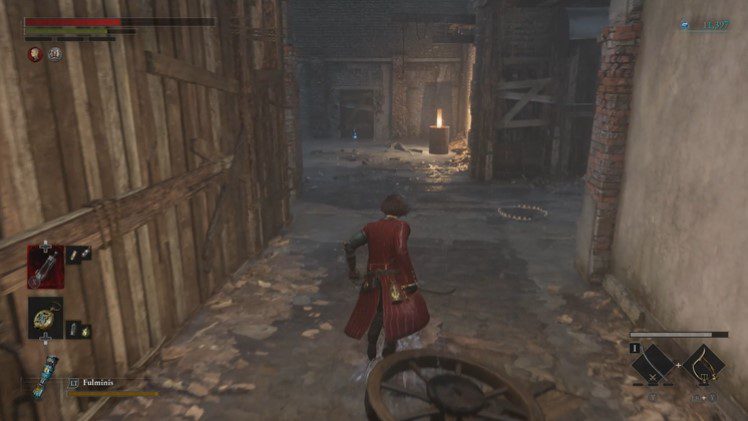
Take a right at the top, heading down the stairs to grab 1x Radiant Ergo Fragment. You’ll find a fair few enemies in this area, but next to one of the dog cages just off to the right, you’ll be able to grab 1x Attribute Purification Ampoule.

Climb up the next staircase and on the balcony (pictured above) pick up 1x Dim Ergo Fragment. This next linear alleyway will eventually see you meeting the younger sister of the Brotherhood, who will throw some quips (and projectiles) your way. She’ll soon disappear though. From her position take a left and head up the ladder, grabbing 1x Fable Catalyst.
Drop down from this position and you’ll find 1x Crescent Moonstone inside the archway opposite the ladder we just climbed.

Now we can head into the Red Lobster Inn at the end of the path on the opposite side. It’s a good idea here to actually rush through to the other side. It’ll connect back up to the earlier Stargazer and also prevent a lot of backtracking. Head all the way down the stairs, rush past the infected and out the opposite door. From here, turn right and unlock the door to connect back to the stargazer.

This section is an excellent place to farm Star Fragments, especially later on in the game. There’s also a merchant here (located up the ladder next to the barrels on the right through the door from the stargazer) that sells an unlimited amount of projectiles. You may find yourself returning here a lot as the game progresses to restock on goods. Oh, and there’s also a chest here holding 1x Legion Caliber.
Inside the inn are three simple infected and a monstrous big brute with huge spiked arms. It has a long reach but it’s also susceptible to fire. It’s not particular quick and it can be taken out with patience and burn damage. Four or five slashes should inflict that.
Be sure to use your Pulse Cells and use fire to take it down quickly, and in doing so you’ll gain 1x Star Fragment every time. It also respawns all the time so if you end up consuming all your Star Fragments calling the Specter for the boss, you can keep using the Stargazer outside to respawn it and continue slaying it.
Try to save your projectiles though for what’s to come. Our destination is actually up the stairs in the main inn area (pictured below).

At the top, head through the doorway and move all the way to the very end. Red Fox and Black Cat will be up on the rooftops and throw some quips your way, before it’s onto a very tough boss fight.
Black Rabbit Brotherhood
Boss Fight – Black Rabbit Brotherhood |
||
|
While there aren’t phases to this fight per-se, there are a few obstacles that make things considerably harder. Along the way, various members of the Brotherhood will jump into the fight and join the Eldest to try and tip the balance in their favour. However, it’s worth noting you only need to kill the Eldest, not the other members to win this fight. However, it’s highly advisable that you move into this fight without Fulminis attached. Instead, switch your legion arm to puppet string. Furthermore, if you’ve been following this guide, equip Patience Amulet to help with your stamina, given we’ll be dodging all over the place here. But even with that knowledge, Eldest alone is a bit of a headache. He has a huge sword, a monstrous reach and some absolutely devastating moves. He has a few big combos, including a five strike, six strike and an eight strike blade combo, all of which finishing with an over-arm slash or a slash to the side and a small window of time to attack. Eldest also has a straightforward single lunge down, and a spinning attack where he’ll turn around five times in a row, hitting anything that moves. He’ll also follow it up with a sword slash out. If that wasn’t enough, he also has an overhead slash attack that ends with a Fury Attack, where he’ll follow up a single strike with three more overhead hits. In terms of strategy, you want to keep moving and get used to spinning your camera around too. At 75% health, 50% health and 25% health, each of the different Brotherhood members will jump into the fight. We’ll go over strategies for taking these guys out quickly, and then move onto the Eldest strategy after. Ideally, you want to dispatch the Brotherhood members as quickly as possible when they arrive in battle. Younger Sister StrategyThe youngest of the Brotherhood, there is a really easy tactic for cheesing this fight and dispatching her immediately. As soon as she enters the arena, target her and use the puppet string. When she’s moved to your direction, slash a few times. When she backs up, use the puppet string again. Rinse and repeat. While she’s not particular difficult to beat, she is nimble and quick. Her Fury Attack is a pain, as she’ll shoot across the battlefield and she has a couple of projectile attacks with daggers that can render you groggy. Failing that, she’s also suspecting with rear Fatal Attacks too and during this animation, Eldest’s sword attacks will not hit you for damage. You want to be mindful of the Eldest though, as he tends to back up a bit when another Brotherhood member is in the fight (this applies for all of them) but then charge at you from the other side of the arena and lash out. Middle Brother StrategyAt 50% health, a new member of the Brotherhood will join the fight. The Middle Brother is a pikeman and likes to swing it around and hit you hard, including lashing out with lunges and swipes. There’s also a big jump attack where he’ll fly in the air, hang for several seconds and then crash down. The idea here is to get behind him quickly, using your dash to get those Fatal Strikes in. Although his attacks have a big range, you can dodge-roll through a few of them given the obvious wind-ups. The small window of time where he remains static is an excellent opportunity to get behind and get that strike in. It’s all about dodging with this one. Elder Brother StrategyThe Eldest brother requires a very specific strategy compared to the other two siblings. He uses a sword and likes to hit hard with it. You want to use your parry and guard almost exclusively here, always being mindful of Eldest’s location. You can also use the puppet string on him, given he also likes to use it against you if you get too far away on the battlefield. This fight is far more methodical and getting behind for a Fatal Strike is tricky unless you have the specter helping you out (if he’s survived that long of course!) Guard the simple swipes and hit back with your own. There’s also a flurry of several strikes he’ll perform, followed by a longer lunge that you need to be mindful of. You can guard through all of this. Eldest StrategyThe Eldest is a nasty foe and can’t be hit with a Fatal Strike. You can inflict Burn damage and you can also use Fulminis (unless you’ve gone for our Puppet string strategy above) to inflict lots of electric damage. Be mindful of dealing lots of damage and pummelling without checking the battlefield though as the other Brotherhood members can stack up if you’re not careful. Tackling all four at once is not fun. Or recommended. Keep watching Eldest’s sword blows and use a combination of guarding and dodge-rolling through, the latter of which to be used for the final strike. The combos that end with an overhead swing are perfect spots to get a couple of hits in. There are some rare occasions where Eldest will get stunned too, allowing for bonus strikes, but you want to actually count each of these combos, to know exactly how many hits Eldest will inflict so you’re not caught in a big combo. Patience is the game here and be careful of Eldest’s reach, which is monstrous. You want to use a lot of dodging backwards rather than dodge-rolling and don’t get greedy with your strikes either. Aim for one strong attack or two simple strikes at a time. Another good tactic here is to use that Merchant inside the inn before the fight to buy Shot Puts. These are super handy and can actually stun Eldest. It’s a good idea to save these for the final portion of the fight, ideally after you’ve dispatched all the Brotherhood members and have 25% of health remaining. Eldest’s move-set never really changes, so use that to your advantage. This fight is likely to last a good while so you’ll have plenty of practice for figuring out how many strikes Eldest will conduct in each of his combos. Oh, and if you’re really struggling, you can always add 5 Shot Put, 5 Thermite and 5 Saw Blades and unleash all of these back to back toward the end of the fight! Eventually Eldest will go down and this very tough fight will be over. |
||
| Rewards: | ||
| 1x Resplendent Ergo Chunk | Taunt | 10180 Ergo |

With the Brotherhood defeated, repair the Stargazer and then head into the newly opened Town Hall.
Malum District Town Hall

Inside, you’ll find Black Rabbit Brotherhood Ledger on the table, and a chest behind the bar holding 1x Quartz. The door to the left holds a strange portrait up on the desk so be sure to interact with this, to add Portrait of a Boy to your possession.
Up the stairs back in the main atrium you’ll find [This Month’s Trend: Stalker Masks]. Proceed all the way to the back of the house, through the winding paths and you’ll come to an elevator. Take it down and speak to Giangio in this room. Just to his left will be some double doors. Open them up and interact with the tree in the courtyard.

This tree will be used as currency to gain new wishes for our Cube we gained earlier on in the level. This is incredibly useful for an extra boost in battle, and the fruit can be exchanged with Giangio for things like extra HP for the Specter, increasing max stamina for a set period of time and even buying Star Fragments. Although it’s highly recommended you don’t buy Star Fragments, given Malum District has that aforementioned farm spot for these.
When you’re done, head down the hallway and you’ll find a secret compartment open up in the wall. As you turn, you’ll find yourself back in Hotel Krat! Hand the Portrait of a Boy to Geppetto and he’ll also encourage you to go and speak to Antonia for a key to Rosa Isabelle Street.
If you haven’t been exploring the hotel, she’s the lady to the left of the Hotel Stargazer in a wheelchair staring at her own portrait on the wall.


You’ll find Rosa Isabella street up the main staircase to the right, and then take the first left and interact with the door at the end (pictured above).
<< Path of the Pilgrim |
Rosa Isabelle Street >> |
You can check out our full walkthrough and game guide here! |
|