
Alan Wake 2 Guide: The Heart
Area List (Tap to jump down the page!) |
||
Track Nightingale At Cauldron Lake |
||
Defeat Nightingale |
||
Investigate The Previously Flooded Area |
||
Streamside, The Witchfinder’s Station & Collectibles |
||
Return To The Car |
Follow Casey
When you step out the car, we’ll officially be starting Return 2, the second chapter of Alan Wake 2.

Follow Casey all the down down the shortcut path, but stop by at the comms tower, where you’ll find Ilmo (the guy from the Adventure Tours videotape) and Steve Lin. The latter is a repairman, who explains that the Federal Bureau of Control monitors the area’s volcanic activity. He’s there repairing the station and apparently “raccoons” have caused havoc with the wires. Uh-huh.
The note inside the comm station alludes further to this though, pointing out that raccoons very much aren’t the issue and there’s something else going on here. Alas, the plot thickens!
Return to Casey and continue down the hill.

At the crime scene, approach the table once more and without Mr Nightingale there, you’ll uncover another of those strange triangular symbols. You’ll also gain 1x Picture. Just beyond that, you’ll also find bare feet tracks leading away from the scene.
Track Nightingale At Cauldron Lake
Follow Nightingale’s Trail
At this point, make sure your flashlight is on by pressing O (B) and keeping your light shining down so you can follow the footprints.

This will eventually lead you over to the Witch’s Hut. At this point, you can gain the Casey Lunchbox if you missed it before, but for now head further into the water. Open the red box on the right and collect 1x Trauma Pad and some bullets.
Beyond this, follow the sign to the “Witchfinder’s Station”. Keep the fallen logs to your right and keep moving forward. At the end, you’ll find a branching path going left (back to land and the Ladle sign) and right, deeper into the water. Go left.

When you make it back onto land again, return to the spot where you originally picked up the Manuscript Page in the tree. You’ll notice a strange light inside the tree. You’ll be prompted for this but hold R1 to toggle a strong flashlight beam to destroy the orb. Collect 1x Manuscript Page from the tree.
Locate the Witch’s Hut
If you’ve been following this guide, you should be familiar with the Witch’s Hut by now. If not, you can always open your map to find the exact location. Swing round from the tree, head through the water again, climb the ledge to the left and arrive at the hut.
However, once you get there you’ll find the lights are out. Now, head outside the house and notice a fuse-box on the left-hand side of the building.

In order to find the fuse, head opposite, over the bridge until you reach the Casey Lunchbox and the deckchair on its own. Instead of exploring to the right, go left and interact with the blue box atop the red barrel to gain 1x Fuse.
With the fuse in hand, head back and interact with the Fuse Box.
The light is now on and you’ll be introduced to your first Break Room. These handy points serve as quick-save and manual save rooms. The latter is super useful, especially if you’re aiming to get all collectibles and move too far into the chapter.

The important part to interact with though is on the wooden bookshelf next to the door (pictured above). Interact with this and gain 1x Manuscript Page. The writing will allude to pushing the heart through the Witch’s Ladle sign. Remember the sign with a hole where the heart would be? That’s our destination.
Before you do though, open up your Mind Place and add in all the clues you’ve found so far. Be sure to use your Profiling Tools for Nightingale too after doing this, where you’ll find two new options.

Once you’ve done both of these and watched the little cutscenes, you’ll learn that the heart is inside the General Store. Excellent, off we go!
Check The General Store
Head back to the General Store and prepare yourself. You’re about to hit your first bit of combat. Make note of the lamppost outside shining a light, should you need to escape, and also remember that L2 is your dodge.
As you head in, don’t be fooled by the strange creature that rushes out the door to the left. This is a decoy. The real enemy is hiding behind the circled wall, ready to pounce (pictured below).

Defeat the enemy and then head inside the new area. Make sure to use your flashlight trigger (R1) on the orb to the left. Also, make note of both the Pouch Upgrade on the right, and a cabinet holding a Sawed-Off Shotgun. The clue to this can be found over by the counter but to make life easier, the code to open this is 739.
Next, open the first-aid box on the ground to grab 1x Trauma Pack and some bullets. There’s also 1x Manuscript Page on the ground and more bullets inside the red toolbox. Finally, interact with the fridge.
Next, press X (A) on the heart and then return to your Case File to fill out a few more clues. With this in hand, return to the Witch’s Ladle sign. On the way, you’ll find two shadowy enemies waiting to strike on the other side of the water.
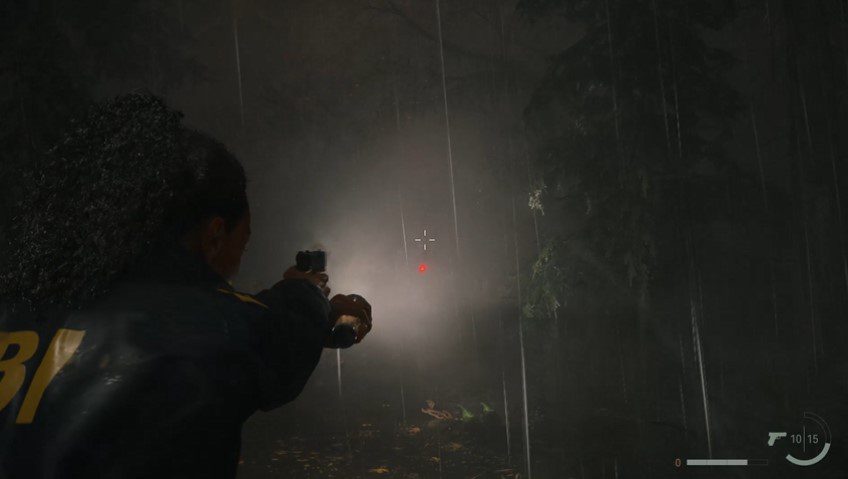
Here, you want to use the same tactics as before. Hold R1 to trigger the flashlight on the enemies and then aim for the weak spot marked in red.
With both of these down, go ahead and add the heart to the sign. The scene will then shift with an ominous red hue. Go ahead and interact with the tree, and prepare yourself.
Defeat Nightingale
Boss Fight – Nightingale |
||
|
Phase 1After a long walking segment, we’ll finally be face to face with Nightingale himself. This is essentially a three-phase fight, if you count the different areas we’ll be fighting him. Before squeezing through the gap, the game will autosave. Make note of your health (in the bottom left corner) because you want to make sure you’re fully healed before this. If you die at any stage in this fight, you’ll have to redo the whole thing again. When you emerge, Nightingale will come at you with a broken log. Don’t be fooled by his lumbering form though, he will regularly teleport forward quickly so he’s on top of you. His swings are quite slow and relatively easy to dodge but being caught by this will deal big damage. Keep a distance and hold R1 to aim the flashlight at Nightingale. Wait for an opportune moment (ideally after he’s swung his log for an overarm hit) and try to aim for the glowing red mark on his chest. Nightingale will then turn into a raging red whirlwind. At this point, run to the right of the tarting area, and you’ll find a path through the rocks.
Phase 2Be careful here as Nightingale will show up just past the red cool box (holding a Battery Pack and bullets). This time, holding R1 won’t show a red mark, but it will slow Nightingale down. This is particularly useful to hold him back and preventing him from dashing to your location. Either way, pop off a few head shots and he’ll disappear. Nightingale will then try to ambush you further on in this area, dropping down from the fallen log (point the camera up and you’ll see the spot) to catch you off-guard. Dodge back, hit him with three or four pistol shots (2 shotgun hits) and he’ll disappear. Phase 3After passing the red bird box (holding randomized goodies inside, usually Batteries and Trauma Pads), you’ll emerge to the final part of this boss fight. Nightingale’s tactics will be the same as Phase 1, only his base speed is a bit faster and he’ll be more aggressive. Again, make sure your health is stocked before entering this arena. Hold R1 to keep Nightingale at bay, hit a few shots and back off. After doing this a few times, Nightingale will go down. |


Investigate The Previously Flooded Area
After a big cutscene involving Alan, it’s now time to head back to Bright Falls. Before we do it’s a good idea to collect up some goodies on the way, as there’s a fair few of them in this area. The previously flooded area has now seen the water recede and there’s more places to explore.

First up, head along the linear path behind Casey, under the fallen tree log and all the way through the beach until you reach an alcove with a fallen log above. Head through and look to your left to grab 1x Manuscript Page, hidden in the grass (pictured above).
Continue along and you’ll come to two paths. One leads to the left and deeper into the woods. The one on the right continues on the beach (pictured below). Head right and under the trees.

There’s a Cult Supply Stash Box just to the left of here. There will be a randomized code of three digits, you just need to copy it and the box will open. Inside, pick up 1x Flare, 1x Medicine and some bullets. There’s also a note on the lid too, which will yield 1x Picture.
Now, head back under the logs and push into the forest. You’ll notice that this is the exact same path that Nightingale took in the prologue and naturally, it’ll lead us back to the murder site and the Witch’s Hut.
Be wary of the wolf that will be stalking you, and make use of your dodging to watch out for its nasty bites.

With the wolf down, follow the sign to the Witchfinder’s Station. This will open up a brand new area that was otherwise flooded. From the lamppost light, proceed down the slope and veer to the left. You’ll find a whole bunch of yellow arrows on rocks.

Follow the location and you’ll come to a rock with 1x Streamside Stash Key on.
With the key in hand, hug the rock wall (so it’s to your left) and then swing around 180 degrees to find a tree with an arrow pointing to the right.

Approach the tree and open the Supply Box with the Streamside Key. Inside will be 1x Trauma Pack, 1x Flare and some bullets. There’s also an ominous note too.
Now, head north on the map by going down the slope and over the red bridge to the other side.
Streamside, The Witchfinder’s Station & Collectibles
The map below will give you the general locations for each of the collectibles to be found in this area.

ONE
You’ll find a campsite on the left you can interact with, and a nursery rhyme on the floor. On the picnic table, right on the end, pick up 1x Crow Doll. Return to the Nursery Rhyme and place the Crow Doll on the sun symbol. Collect up the Crow Doll from the ground and pick up 1x Hammer Charm.
Charms are unique in that they give little stat buffs and can be acquired all over the map by completing these nursery rhymes. Head back on the main path, kill the enemies that show and make your way to Witchfinder’s Station.

It’s worth noting at this point that you can either reach this point by following the path around the long way, under the lamppost and behind, or up the ledge shortcut to the left.
TWO
At the Station, head inside the house and straight up the stairs. In the nursery to the right, pick up 1x Hero Doll and 1x Wolf Doll (pictured below).

There are also some notes on the table about an experiment and test sites in Cauldron Lake. On the dresser opposite the bed, be sure to interact with the file to grab 1x Picture and a crucial clue.
With all of this done, head over o the computer next to the stairs. The password looks to be 6 digits but this is a decoy. It’s actually only four, and the code is 2547.
Once you’re in, there will be a couple of emails about ‘Project Nursery Rhyme’ and you’ll gain 1x Picture as well.
Return to the Nursery Rhyme outside on the ground and place the Hero Doll on the boat. Next, place the Wolf on the tree symbol. Collect up the dolls and head back inside the house.

Follow the paw prints up to the nursery and grab another Charm.
THREE
follow the Path from the Witchfinder Station dead north east. Eventually you’ll come to another Casey lunchbox. Inside, pick up 9x Manuscript Fragments.
FOUR & FIVE
The next pot of call is the Hunter’s Cabin. So from your current location head south and under the fallen tree log to enter the cabin.

There are a couple of notes up on the wall but, more importantly, a nursery rhyme just outside the front door if you turn back and head outside.
For this one, place 1x Crow Doll on the baby chick. Next, place the Hero Doll on the heart. Finally, the Wolf Doll on the house. Collect up all three dolls and head back under the fallen log. By the locked red box on the tree, head forward and pass the tree so it’s on your left.

Defeat the wolf enemy and approach the fallen bird box to grab another Charm (marked FIVE on the map)
SIX
From this location, you now want to move south west, so you’ll come to a stream. When you do, move to the right and you’ll notice some glowing symbols.
There’s a couple on rocks and one on the tree. At the point of the third, you’ll find another Cult Supply Box. The key to opening is on the rock and trees (with the code labelled at Rock, Rock, Tree. The code therefore is in the math. But if you don’t fancy doing that, it’s 658. Inside will be another note, along with 1x Medicine, 1x Flare and 1x Trauma Pad.
SEVEN
Follow the stream back upriver and take out the two enemies lurking nearby. When the path curves to the right and left, go left all the way to the end of the waterfall.
There’s a Casey Lunchbox here holding 9x Manuscript Fragments.
Return To The Car
That’s pretty much it for collectibles and goodies in Return 2. At this point, head back to the car and interact with it to trigger a cutscene and head back to Bright Falls. Watch the cutscene play out and then when you regain control again, we’ll be in familiar territory.
<< Return 1: Invitation |
Initiation 1: Late Night >> |
You can check out our full walkthrough and game guide here! |
|