Alan Wake 2 Guide: Summoning & Gone
Area List (Tap to jump down the page!) |
||
Investigative Work |
||
Perform The Ritual |
||
Survive The Summoning |
||
Initiation 9: Gone |
||
Trap Scratch |
||
Stop Scratch |
Investigative Work
Now we’re in control of Saga again and depending on where you were for the Break Room, you’ll respawn there. Head for Bright Falls and go into the Sherriff’s office. Exhaust all dialogue with Casey and Agent Estevez. When you’re done, pick up 1x Prison Cell Key from Estevez and head back to the cells again.
When you’re there, enter the cell opposite where you tried to give Wake the Clicker. On the way, speak to Ilmo out in the hallway about the Cult. He’ll explain exactly what the Cult are; they were formed to destroy the Taken and kill them when they showed up. They wanted to help the community and the reason they killed Nightingale in the prologue, is because he came back a Taken.
The Cult has been around for a while, and before them it was the Torchbearers. They used the Cult incentive to instil fear in the residents to prevent them going into the woods. They were always about protection, not destruction. Alan Wake’s manuscript pages kept washing up in Cauldron Lake, so they decided to take him out in order to protect their town.

With all of this cleared up, head back into your Mind Place and exhaust all options on the Profiling side of things. You’ll see that Ilmo was telling the truth, and you can also learn more about Wake and Casey too. After, speak to Ilmo again and he’ll promise to round up the troops and help you out.

Head into the cellblock and open the cell with the Prison key. Investigate the file in front of you and and grab the pictures that come with it. You’ll gain 2x Pictures in the process. There’s another file just to the right of this.
Return to Casey and Agent Estevez, exhausting the dialogue for both.

Now, at this point some players have reported some glitches to get the point of no return to trigger. Make sure you’ve completely exhausted both the Case Board and the Profiling options. This includes everything for every single case if the trigger isn’t popping. All of the cases marked with a yellow dot need to be completed. And it is a slog.

Make sure you do everything for the beige and red files in particular. The collectible files (marked in green) aren’t needed. The Clicker file in particular is our current task so make sure this is completed as far as you can. In doing so, it should pop a new Profile option for Odin, called “Trusting Wake”.
Complete this and then extra dialogue options with Agent Estevez will open up, starting with “Know anything about the Clicker?” After this, return to the Case Board and activate the next Profile option for Odin.

If you’ve done everything on the Case Board and gathered all evidence needed, share your plan with Estevez.
Perform The Ritual
Leave the station and head back to your car. Our destination is Cauldron Lake. Drive there and watch the cutscene play out.
When you regain control of Saga again, continue on the linear path we took to the murder site during the opening chapter. It’s a single, linear track so you can’t get lost here. We can’t use the shortcut either.

On the way, the Old Gods of Asgard will tear up the road and you can listen to their amusing banter as you head all the way to the Cauldron Lake beach. There will likely be some Taken that show up and attack, and when your reach the bridge, be sure to hold R1 to clear the orbs blocking the path.
Keep moving along, destroying enemies as you do, until you reach the beach. This is where Return 7 officially starts.

You’ll notice that the band is about to play a song to summon the entities over and lure Scratch in. Hey, wasn’t this a Stranger Things plot? Anyway, I digress.
There’s a long scene here where the band warm up before they start the song properly, complete with slick visuals and pyrotechnics.
Survive The Summoning
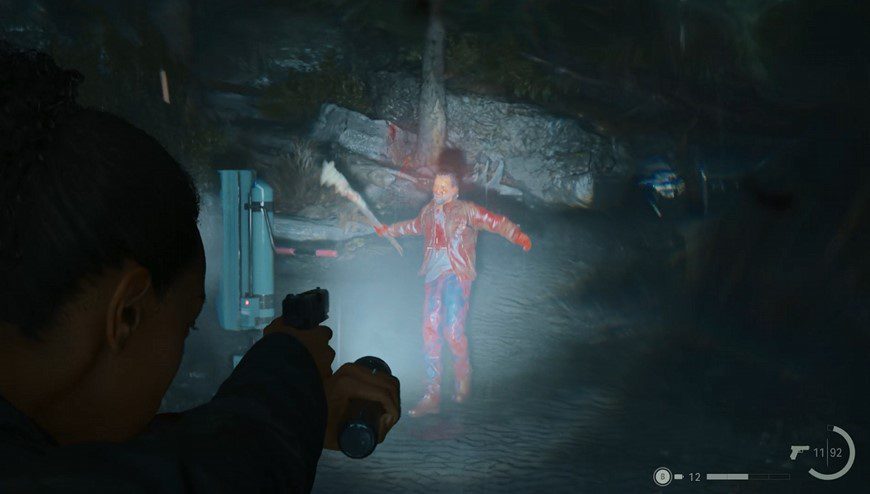
At this point, swarms of Taken will show up and begin attacking. Make sure you have a god number of Trauma Pads and First Aid Kits quick slotted into your inventory. It’s not essential to destroy every single enemy, but you don’t want to be overwhelmed either.
Casey and Estevez will help out and begin throwing down ammunition and Flares, but not health kits, annoyingly. The power will also come and go as well, so you’ll only be able to use the lights sparingly.

Lure the Taken into the light, or Casey’s spotlight and pop off some headshots when you do. The Hunting Rifle, Pump-Action Shotgun and pistol are all effective here. Try to aim specifically for the faster grunts that charge at you, rather than the tougher enemies with more HP that lumber along behind. You only need to survive until the end of the song, and you can always slow gthe bigger brutes down by standing in the path of the Flares.
Also, do note the Shoebox by the far right of the band’s bus, which you can use to add in extra gear to your inventory if you need it.

Eventually, enough time will pass and a cutscene will ensue.
Initiation 9: Gone
We’re now in control of Alan Wake once more. Head into Parliament Tower and into the elevator. Head up, enter the apartment and hold X to watch the video play out from the projected screen. At the end of this big confession from Alice, you’ll gain 1x Part 3 videotape.
When you do, another cutscene will take over and fill in the blanks, specifically how Akan Wake has been an orchestrator of his own downfall all this time. Not only that, but Saga’s Summoning did work… but it threw Alan Wake to an earlier part in the timeline.
It turns out Wake and Scratch are one and the same; the Dark Presence is actually inside Wake and has been messing with him this whole time. Even worse, he was the one haunting Alice.

Trap Scratch
Now, this next section basically plays out as a boss fight… but barely. In all honesty, it’s really not that difficult at all.
You need to crank the handles on the two light generators to turn the power back on and open the cell door. When you step inside, the fight will end.

Each time, you need to hit Scratch constantly until he doubles over and clutches his stomach. Casey and Estevez will turn on a spotlight and give you some time to crank the handle by holding X. Now, you’ll likely get halfway done before Scratch pulls you off and comes at you again. Rinse and repeat.
Scratch is not particularly tough to beat, and his moves will be well-orchestrated. He has the exact same move-set as the fight in the previous Return chapter, and he’ll stalk you across the arena.
Using the pistol is a great idea here, because you can be mobile and fire at the same time without losing too much accuracy.
There are some boxes in this area full of ammo too, should you need it. When you’ve pushed both cranks, enter the cell and trigger another cutscene.
Stop Scratch
After seeing that Casey has now been infected with the Dark Presence, you’ll be in control of Alan Wake for a while. Go over and speak to Agent Estevez

After, pick up your gear and head back to the car. Drive to Cauldron Lake and start the next chapter.
<< Initiation 8: Zane’s Film |
Return 8: Deerfest >> |
You can check out our full walkthrough and game guide here! |
|

